Setting up Unity for ARCore development
In this part, you will learn how to set up your Unity Project for AR development and add core AR components in your Scene.
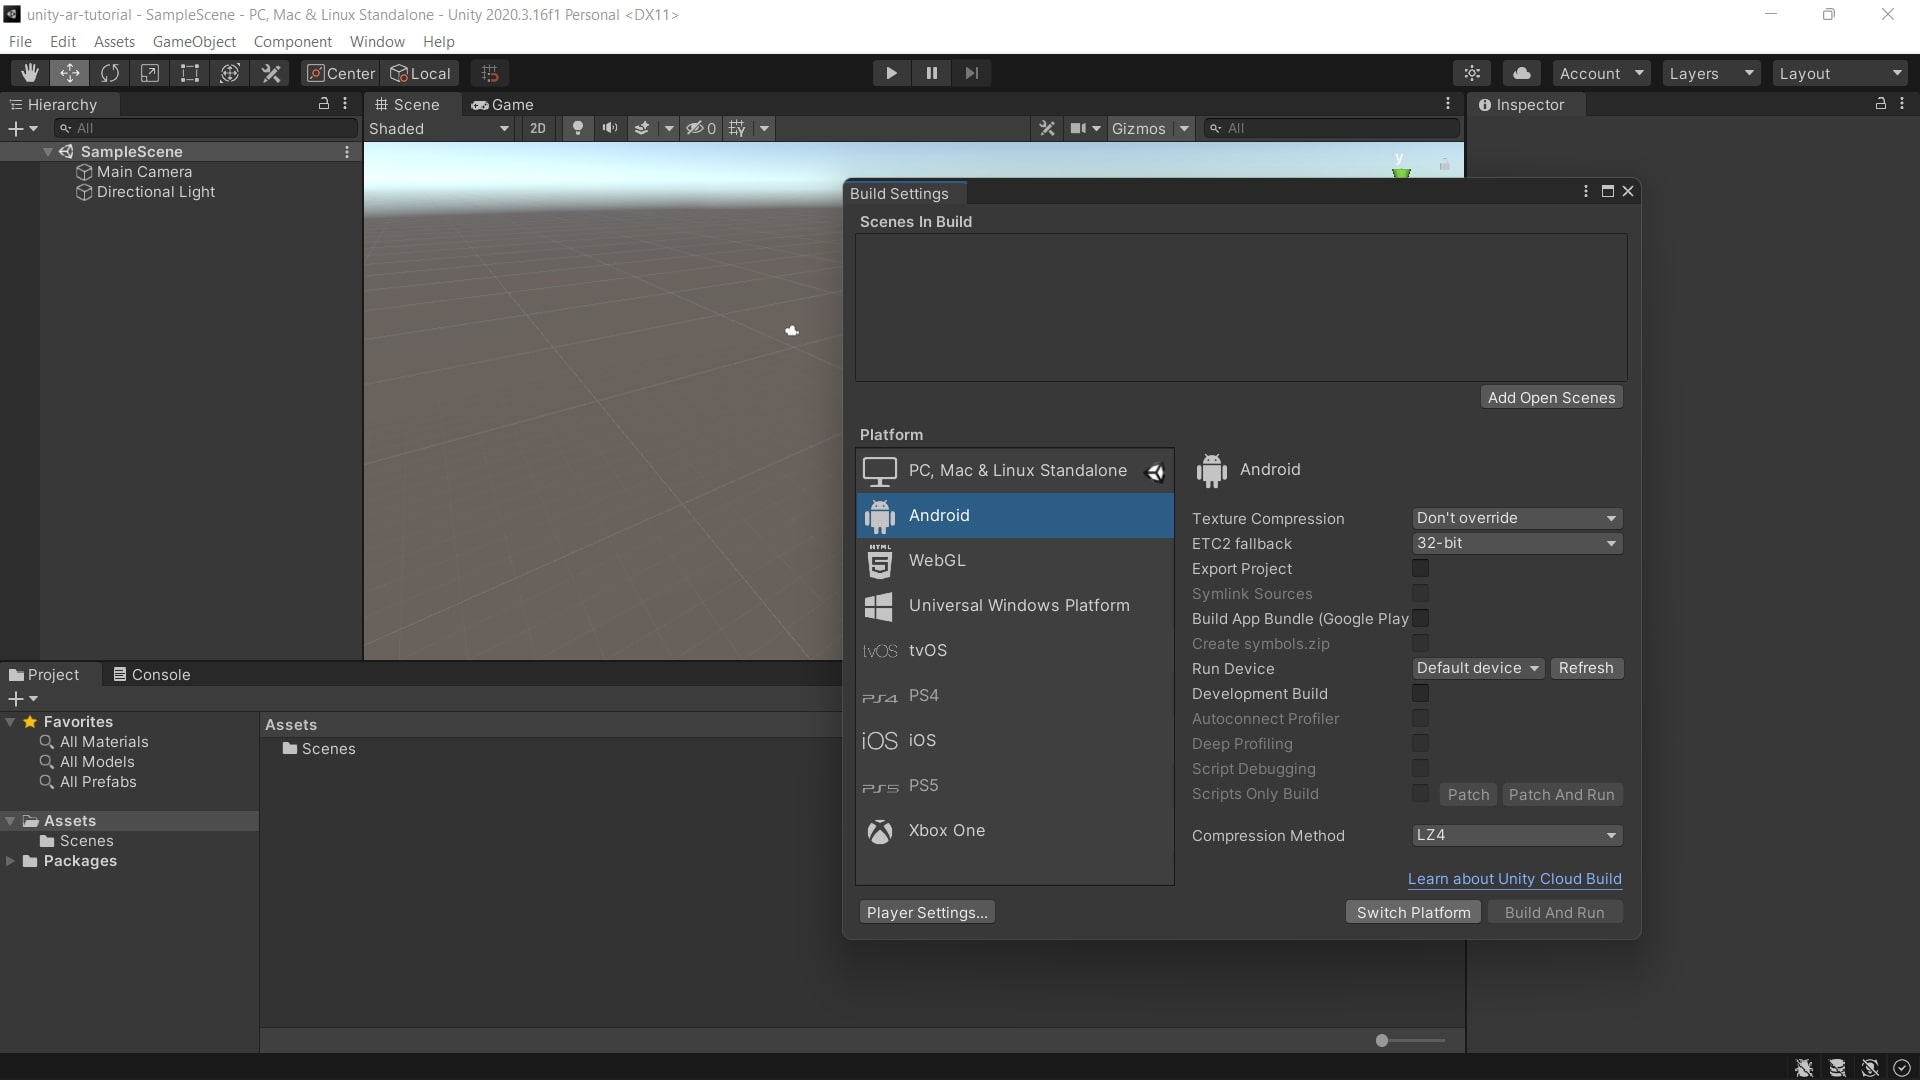
1. Change Build Settings
Configure build settings to build your project for android devices.
- Open your newly created project.
- Click on File > Build Settings.
- Click on Add Open Scenes button.
- Click on the Android platform option.
- Click on the Switch Platform button.
2. Install XR Plugin Management
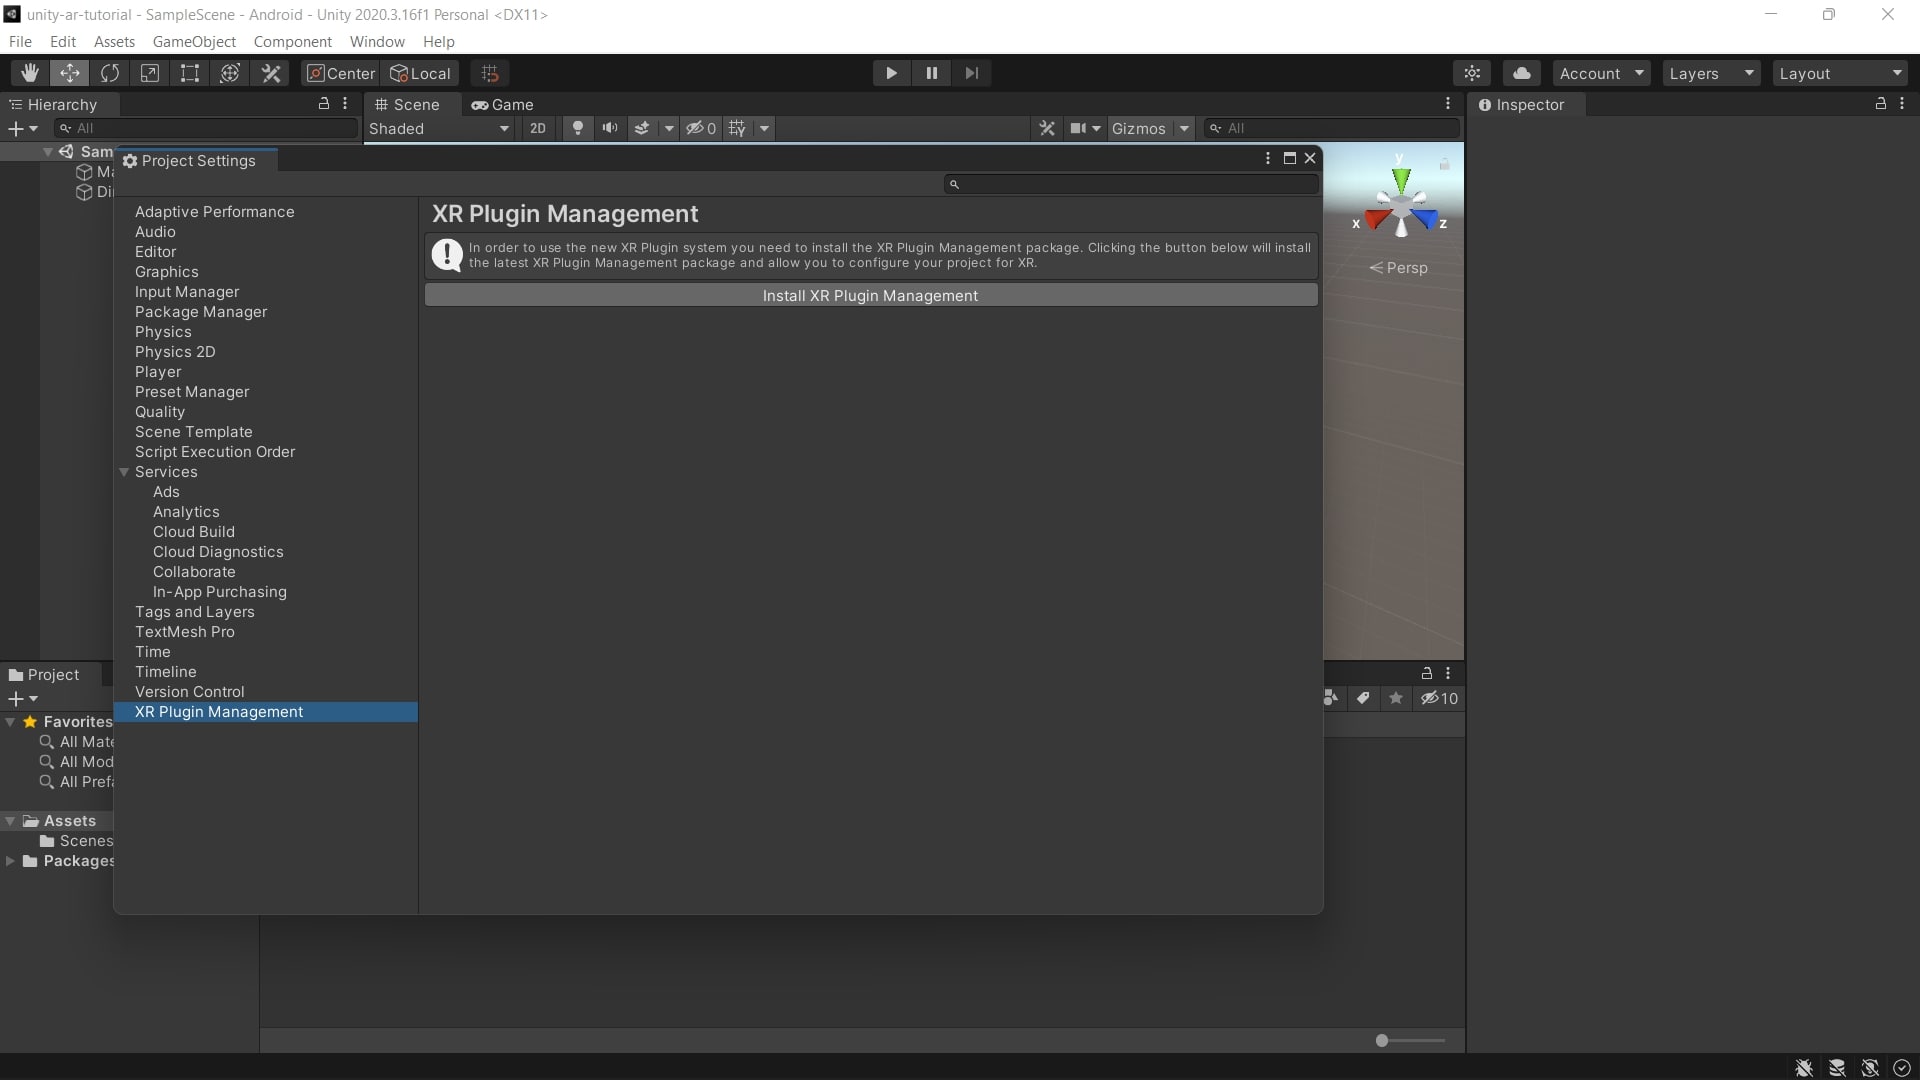
- Click on Edit > Project Settings.
- Select the XR Plugin Management tab.
- Click on the Install XR Plugin Management button.
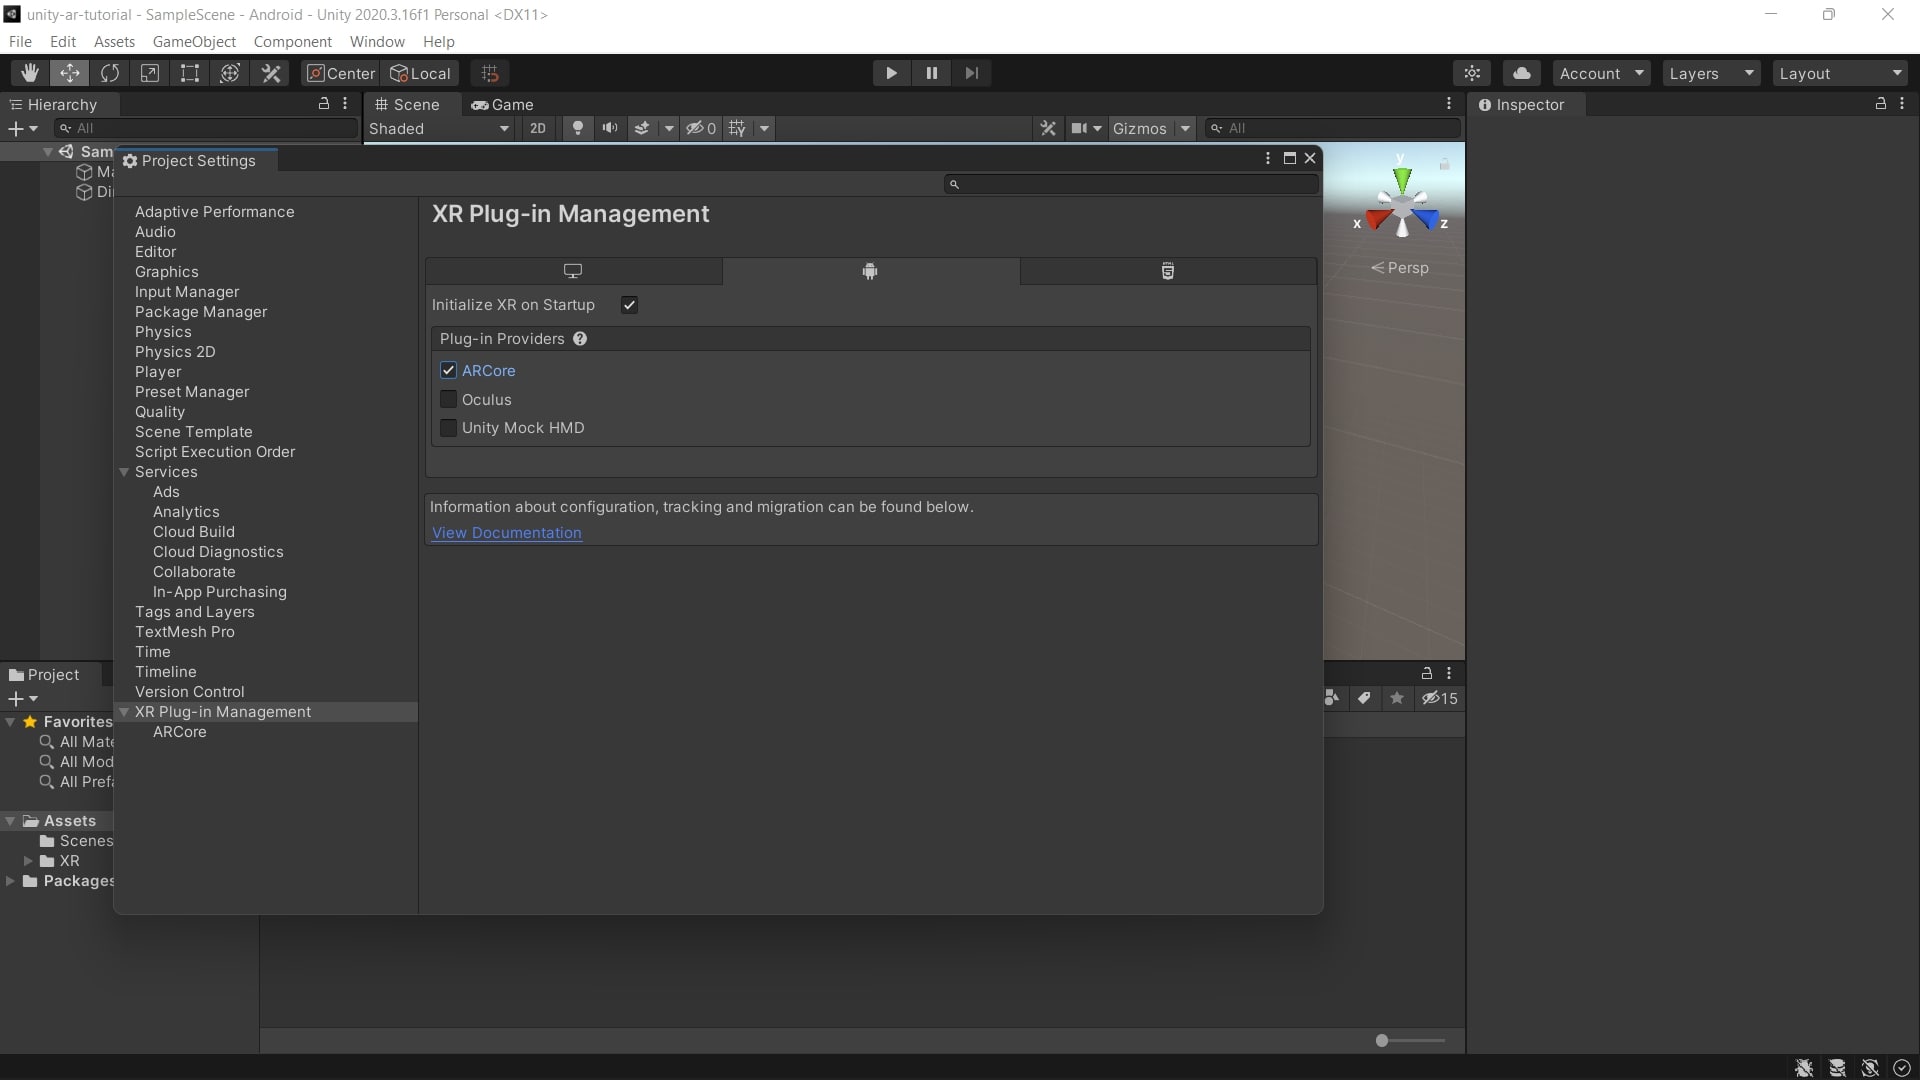
- Click the tab for Android and check the box for ARCore.
3. Install ARFoundation package
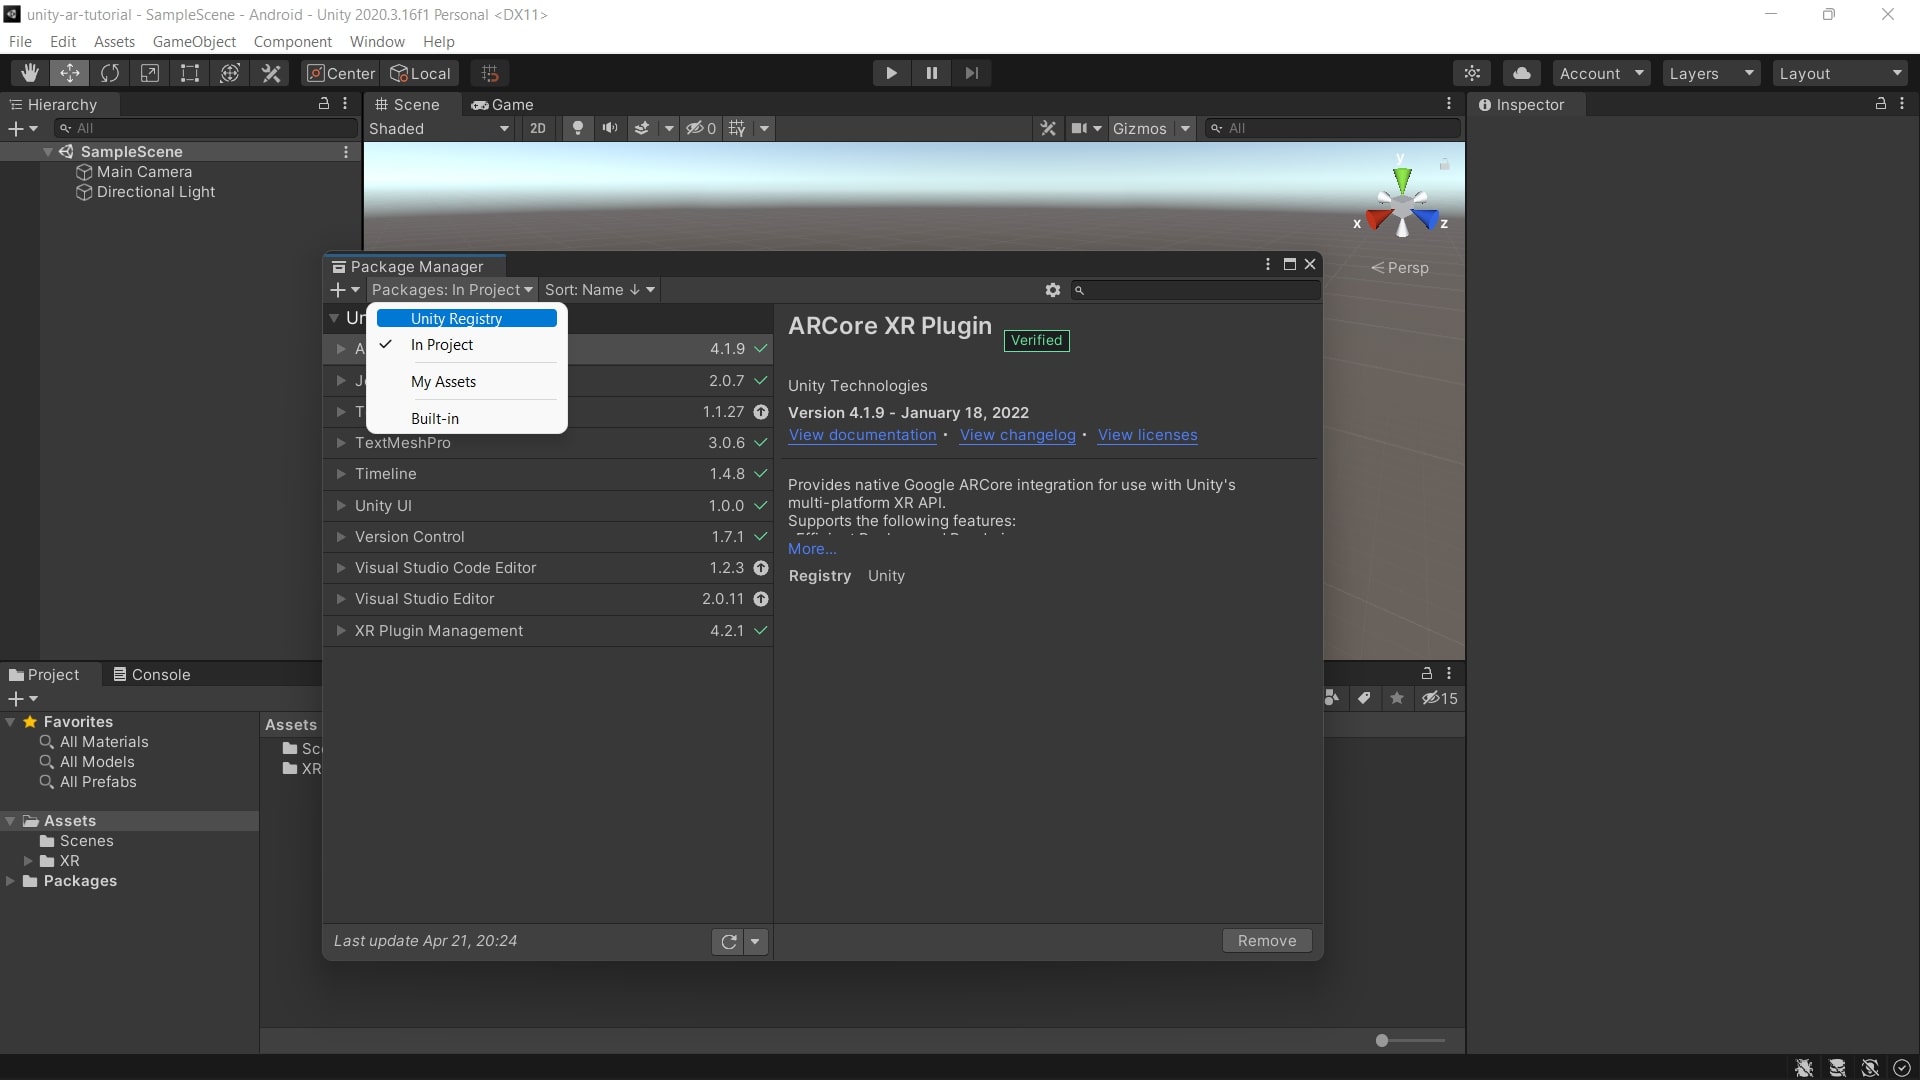
- Click on Window > Package Manager.
- Click on Packages drop down menu and select Unity Registry.
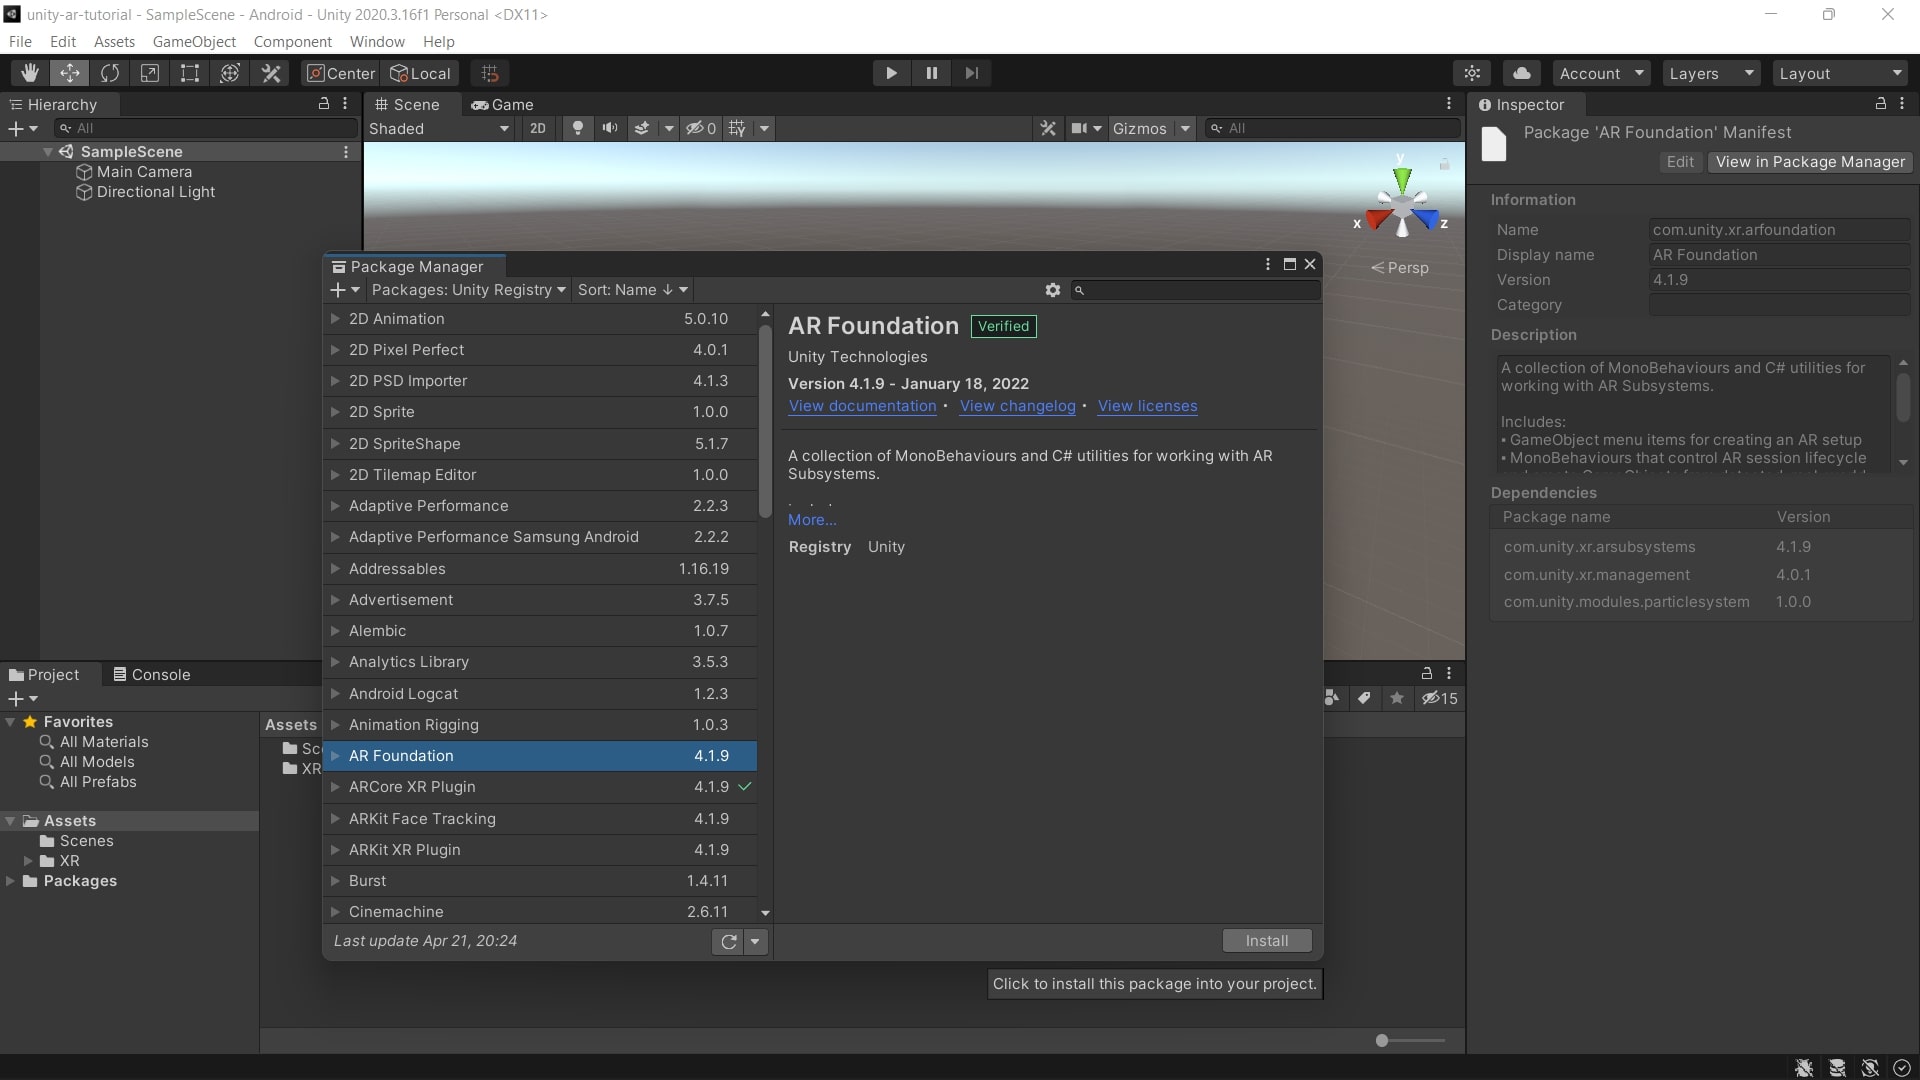
- Find and select the AR Foundation package.
- Click on the Install button.
4. Configure project settings
- Click on Edit > Project Settings.
- Select the Player tab.
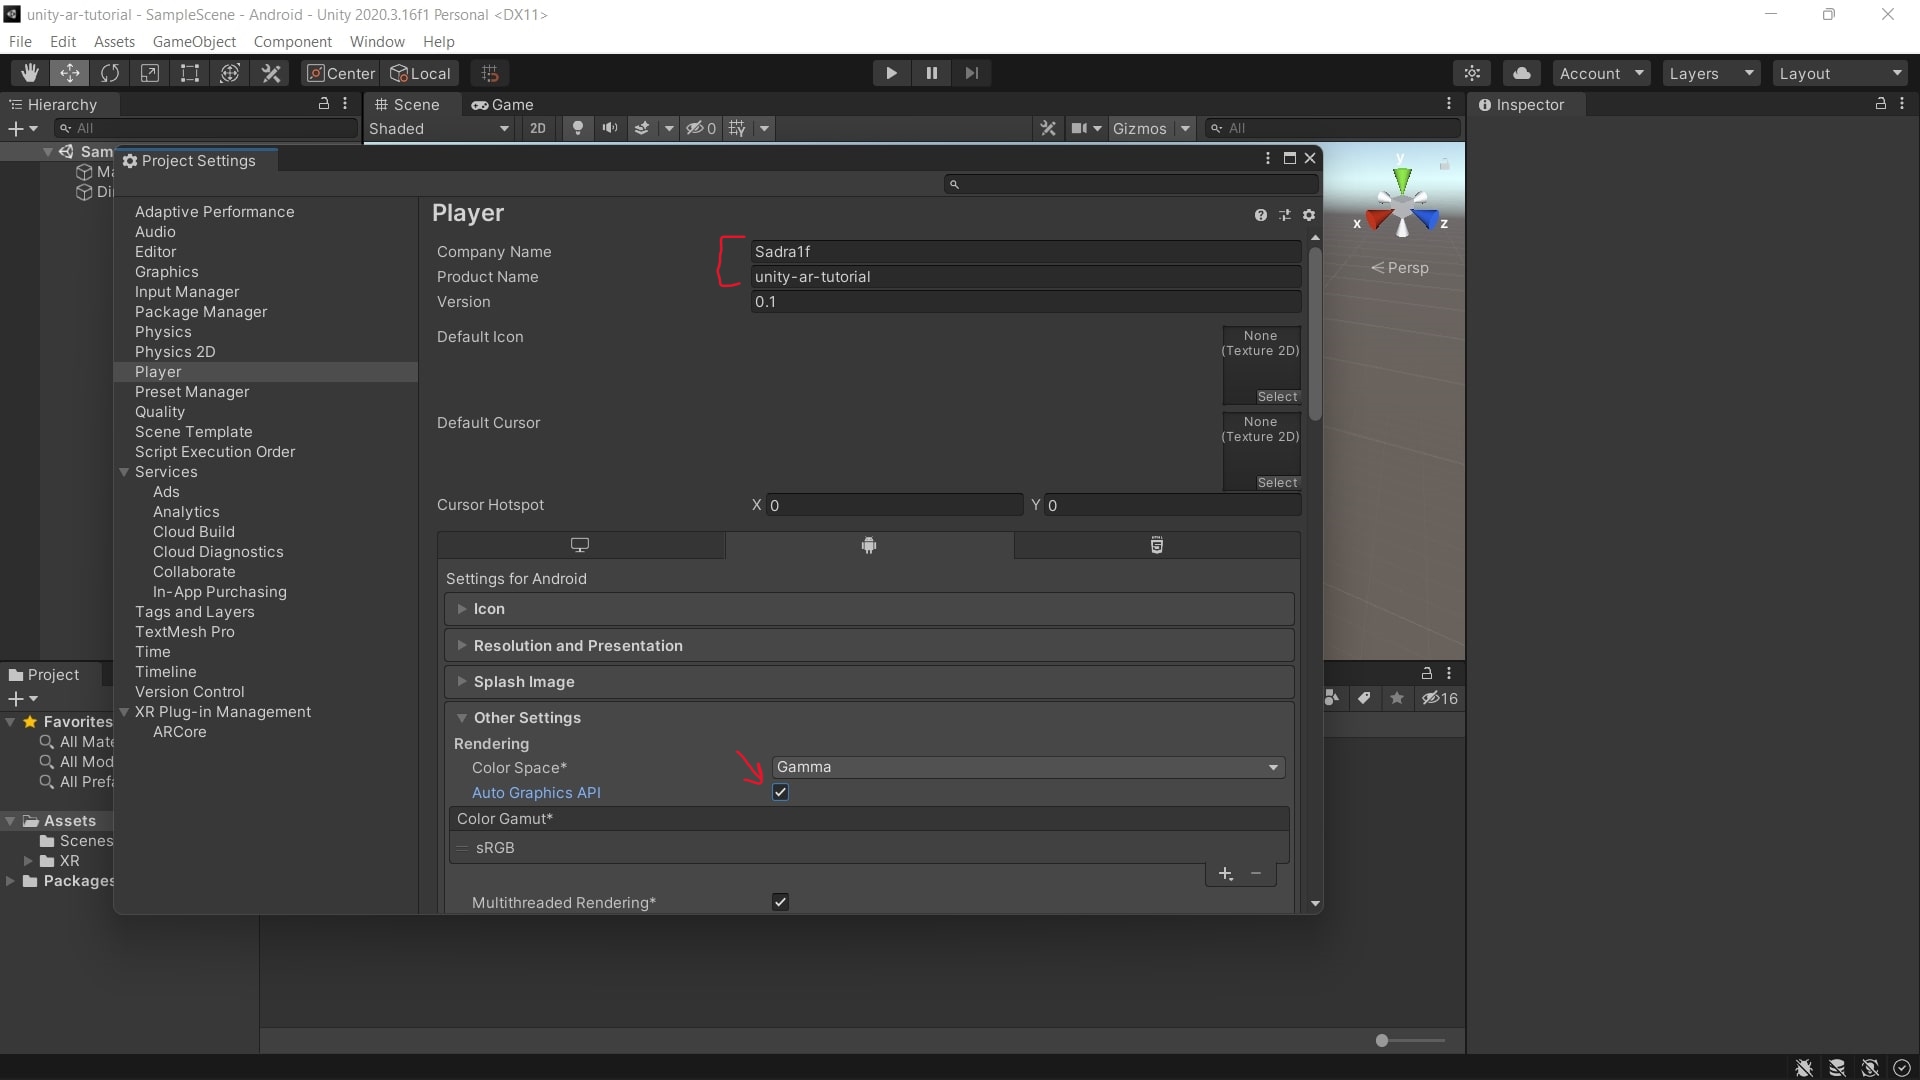
- You can change the Company Name and the Product Name here.
- Make sure you are in the Android settings. You can click on the Android icon to select it.
- Click on the Other Settings section.
- Make sure the Auto Graphics API checkbox is checked.
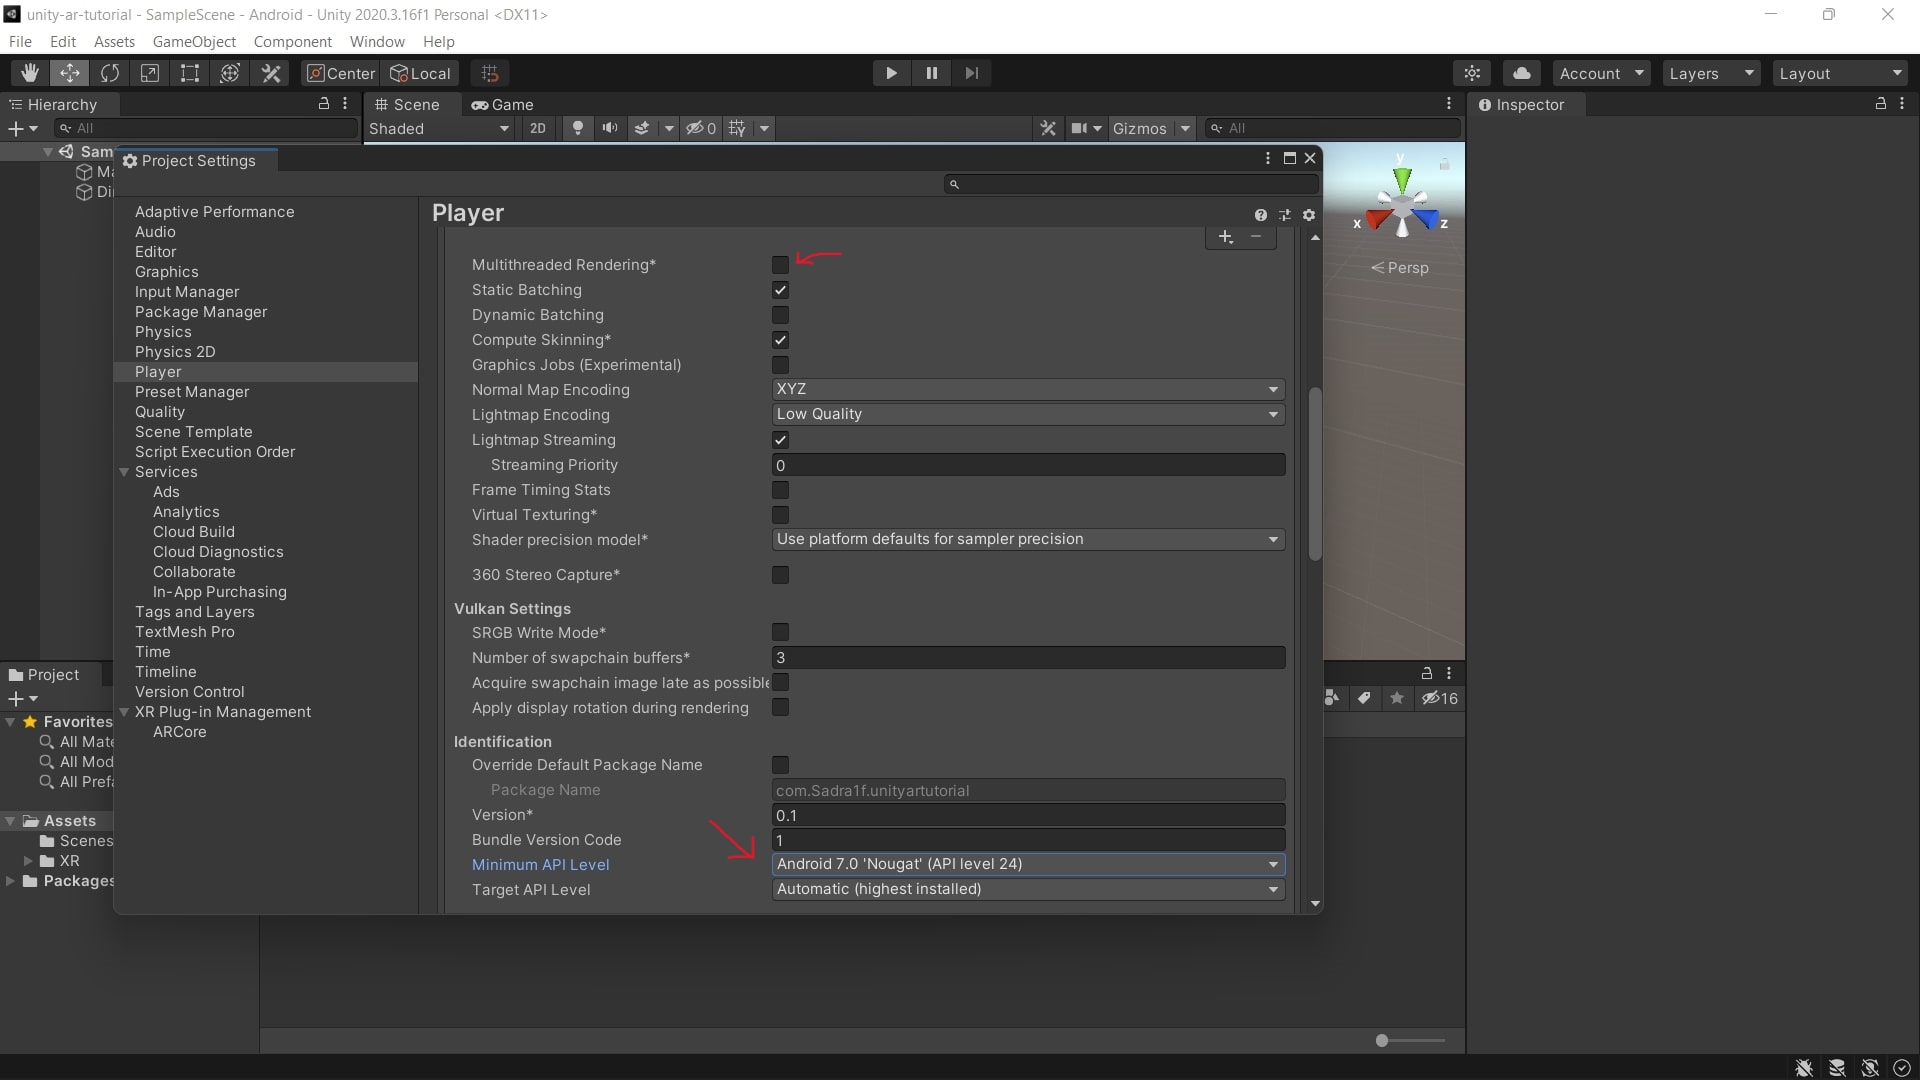
- Uncheck the Multithreaded Rendering checkbox.
- Set the Minimum API Level to Android 7.0 ‘Nougat’ (API Level 24).
- Select the XR tab.
- If there is a Create button there, click on it and save the settings file.
- Select ARCore under the XR tab.
- Change the Requirement option from Required to Optional.
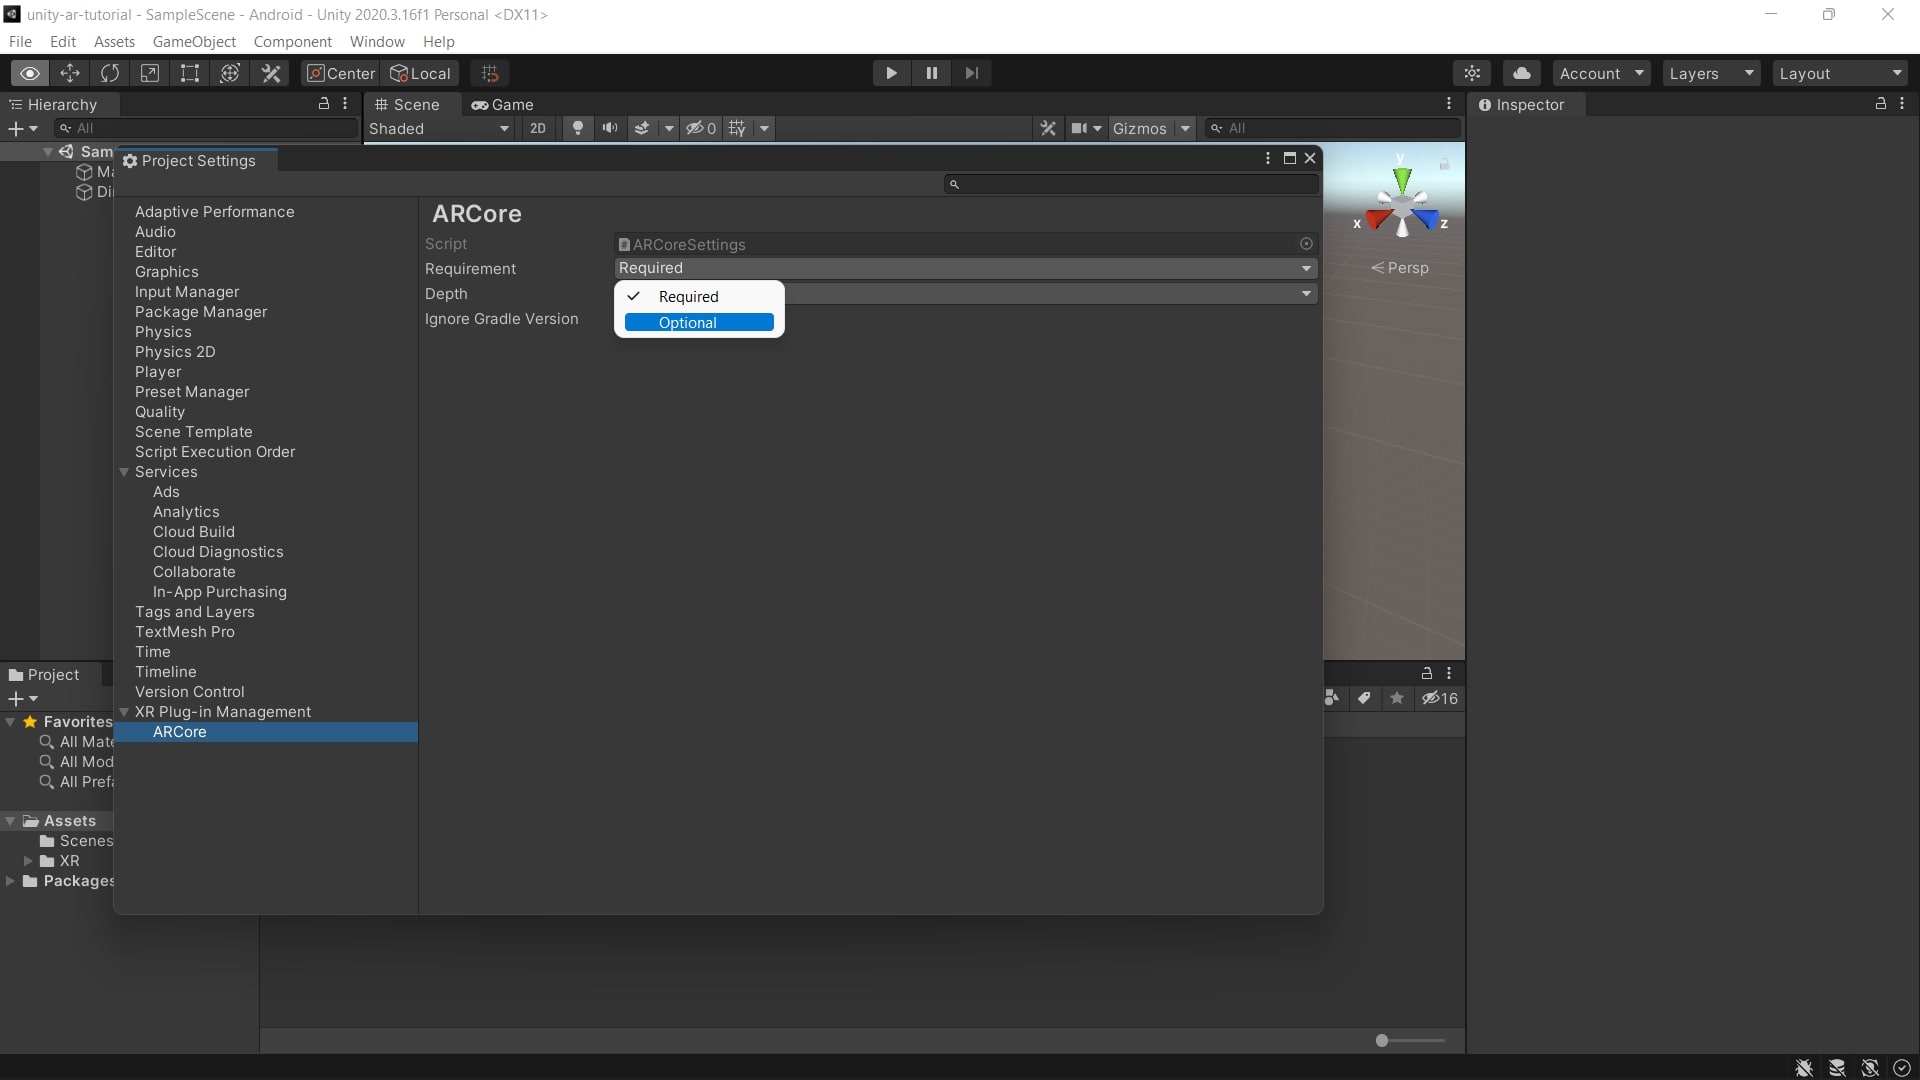
5. Create AR Objects
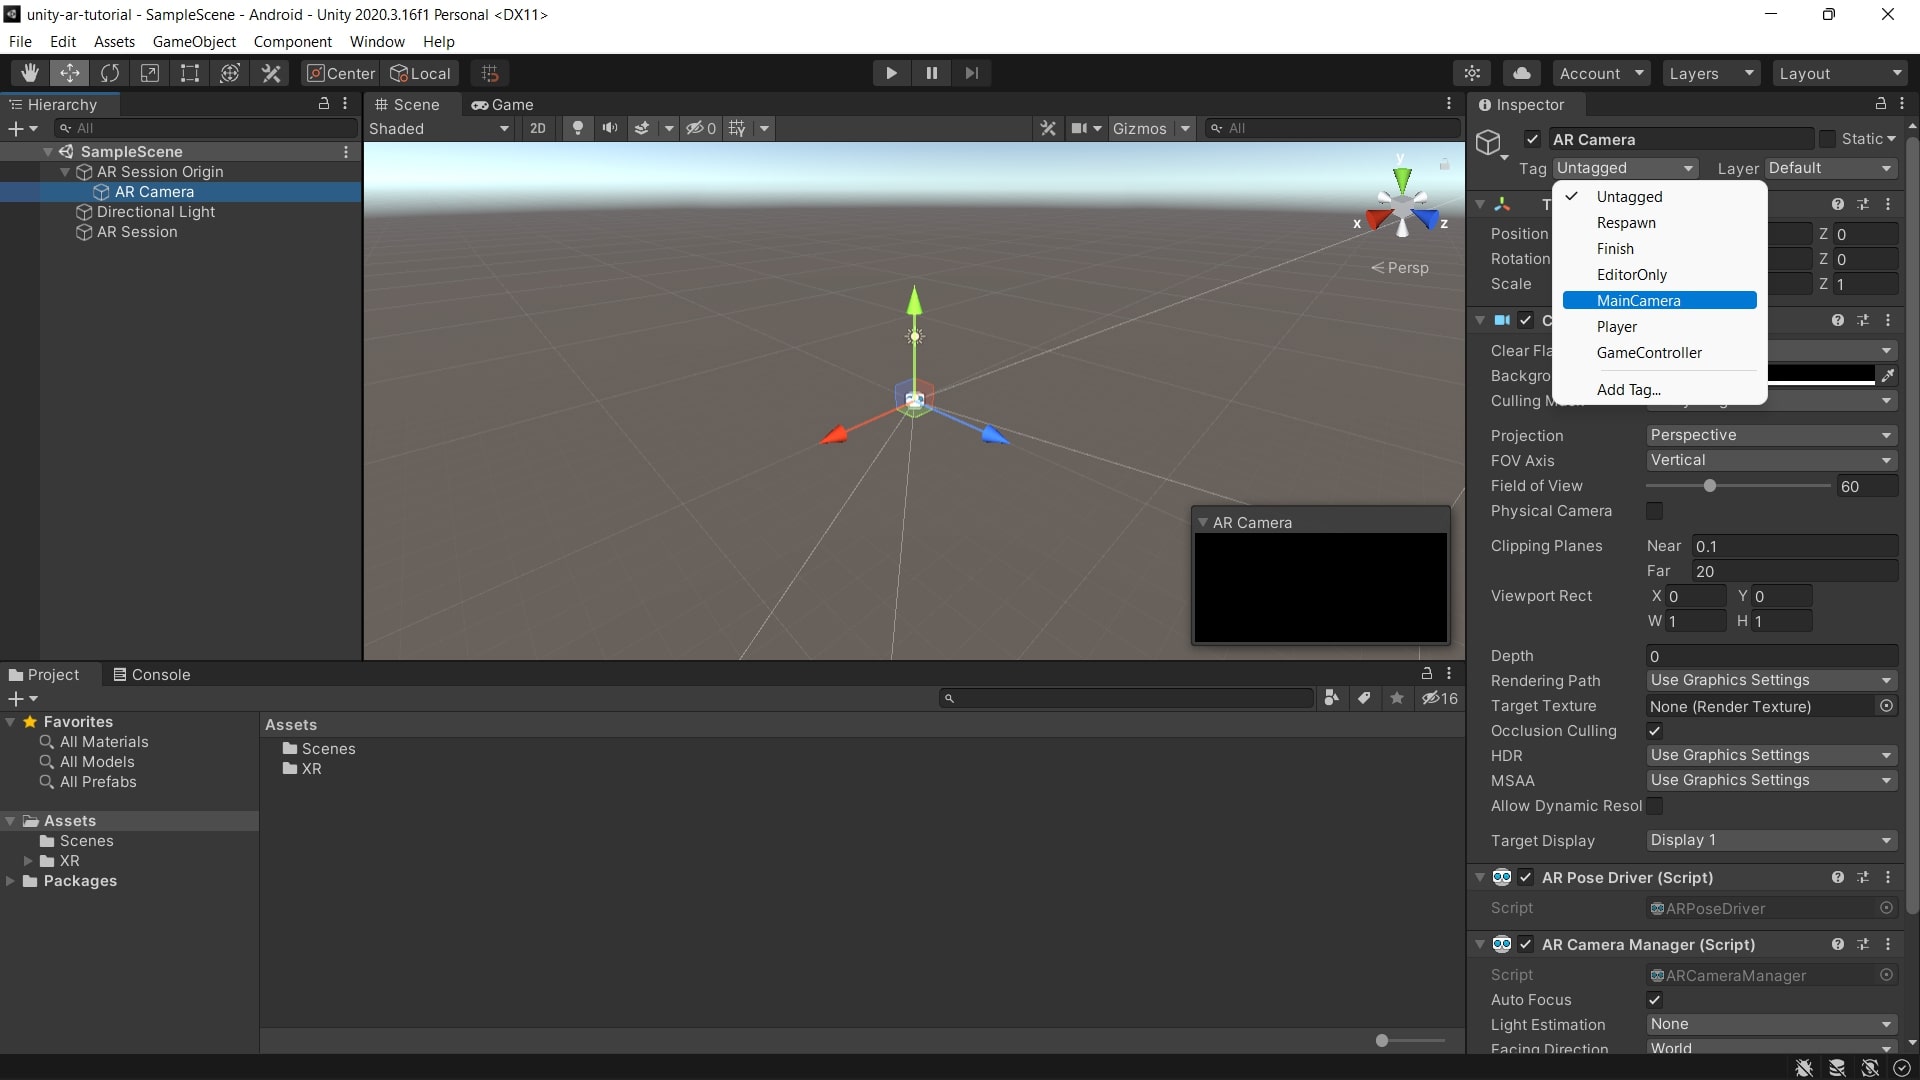
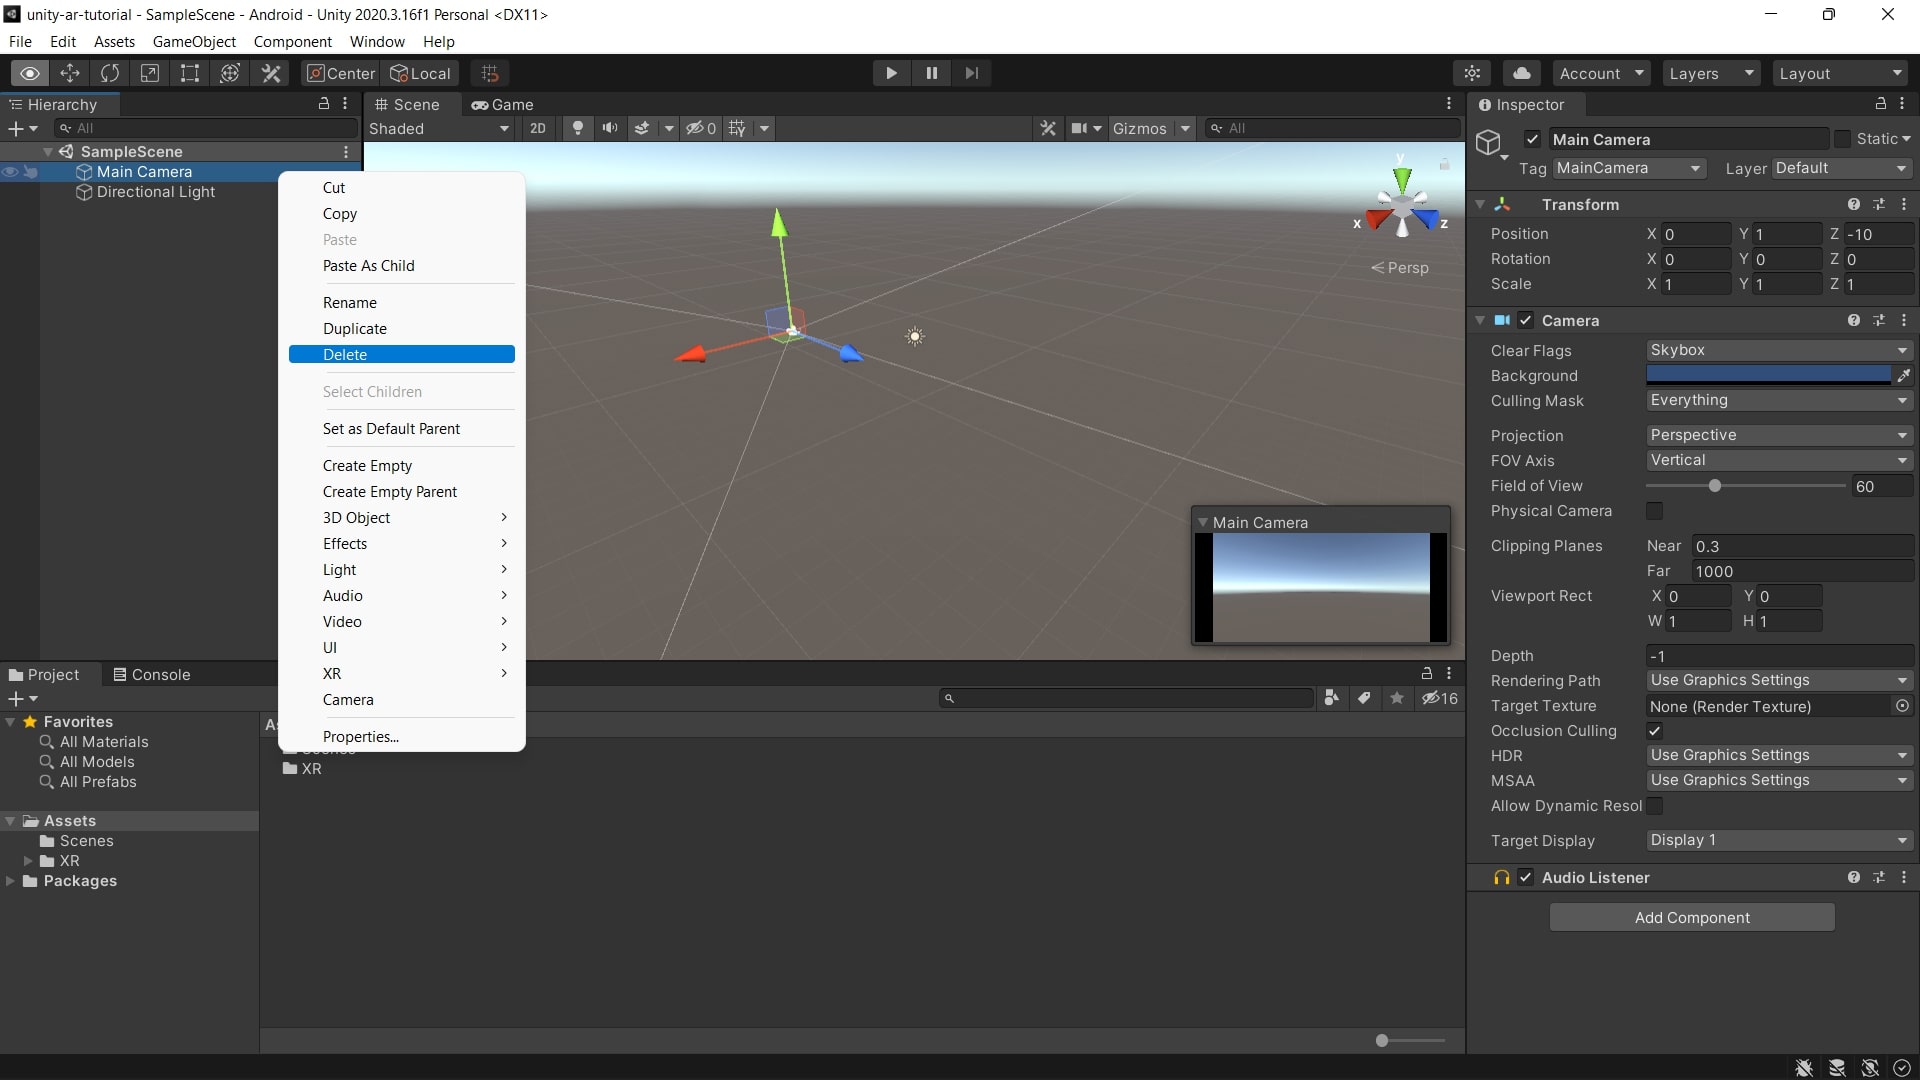
- In the Hierarchy, delete the Main Camera by right-clicking on the Main Camera > Delete.
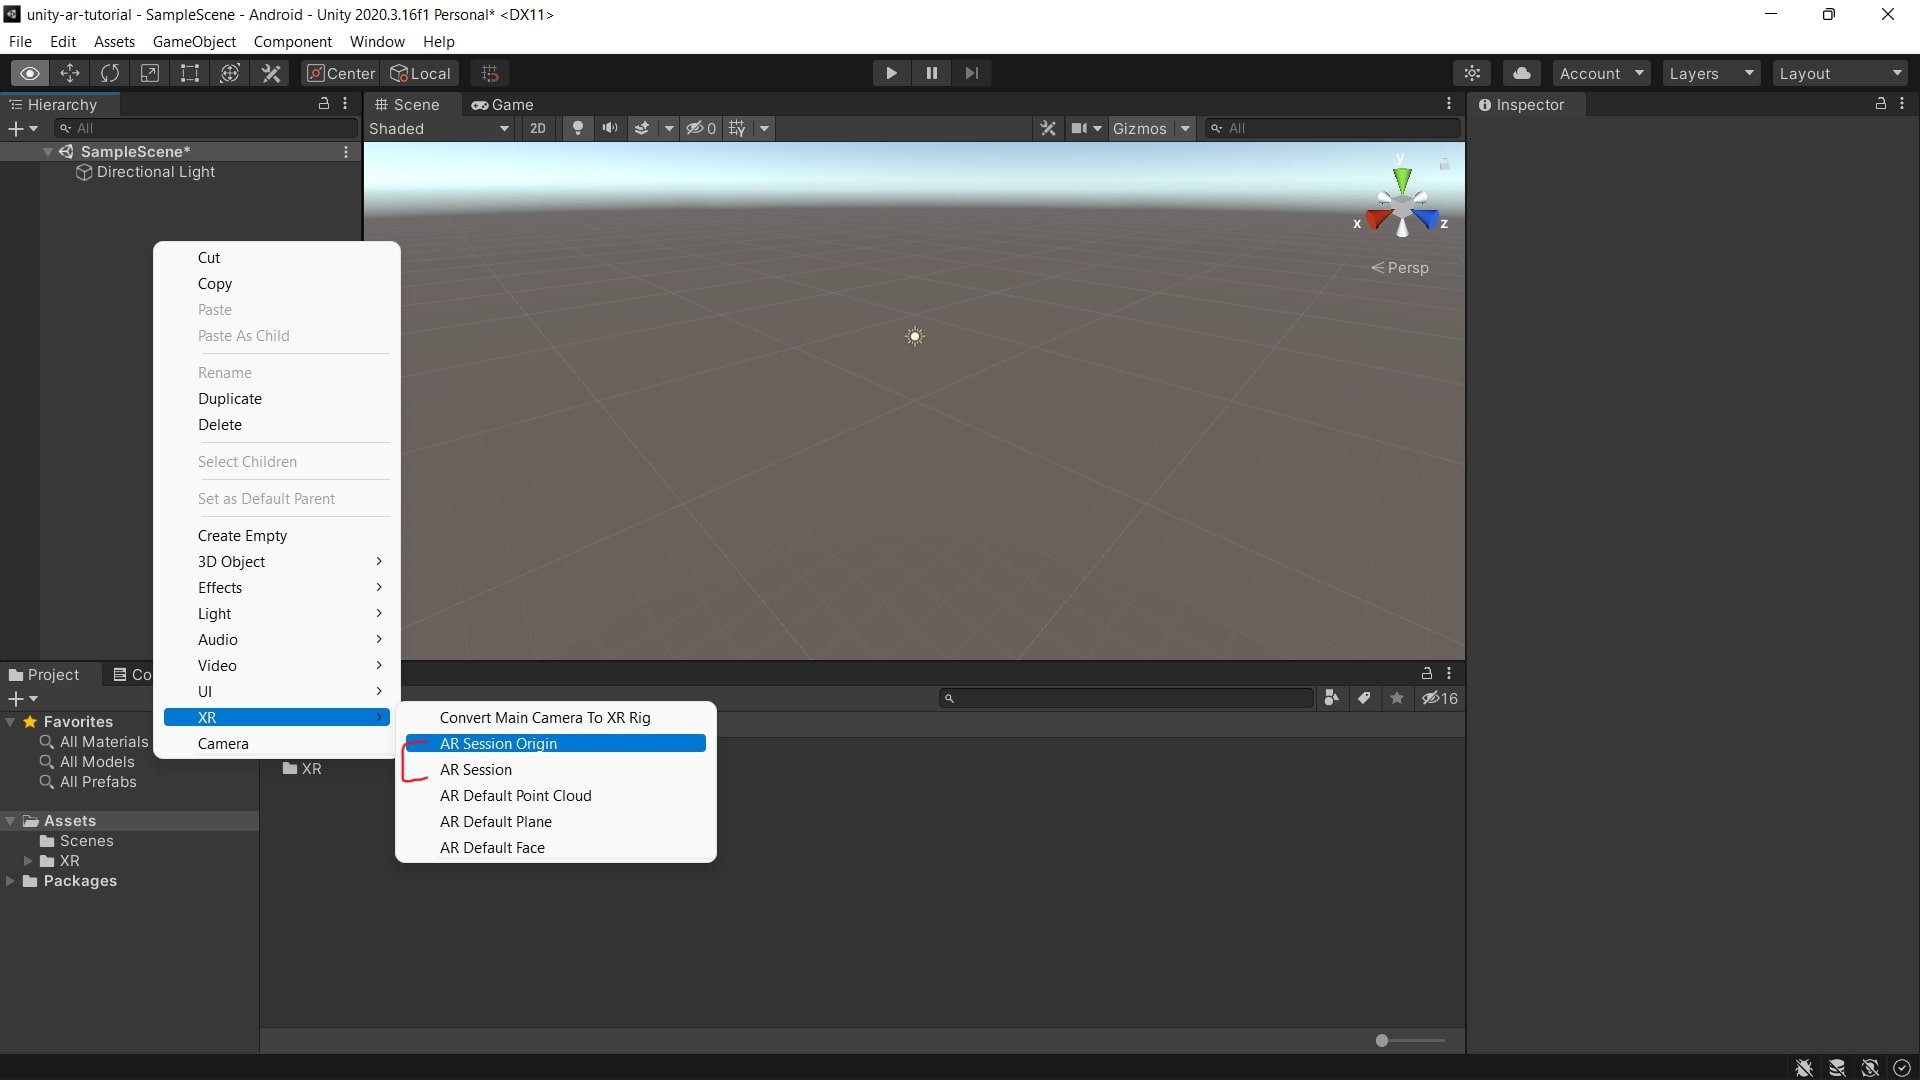
- Create an AR Session Origin object by right-clicking on the Hierarchy > XR > AR Session Origin.
- Create an AR Session object by right-clicking on the Hierarchy > XR > AR Session.
- In the Hierarchy, click on the drop-down arrow next to the AR Session Origin object.
- Click on AR Camera.
- Under the Inspector, there is a Tag section. Click on the drop down menu and select MainCamera.
