Placing objects in AR
This part will help you understand how to use plane detection in AR foundation to place an object on a plane and you will create an AR app that has the functionality to place an object on a detected plane with a tap.
1. Enable Plane Detection
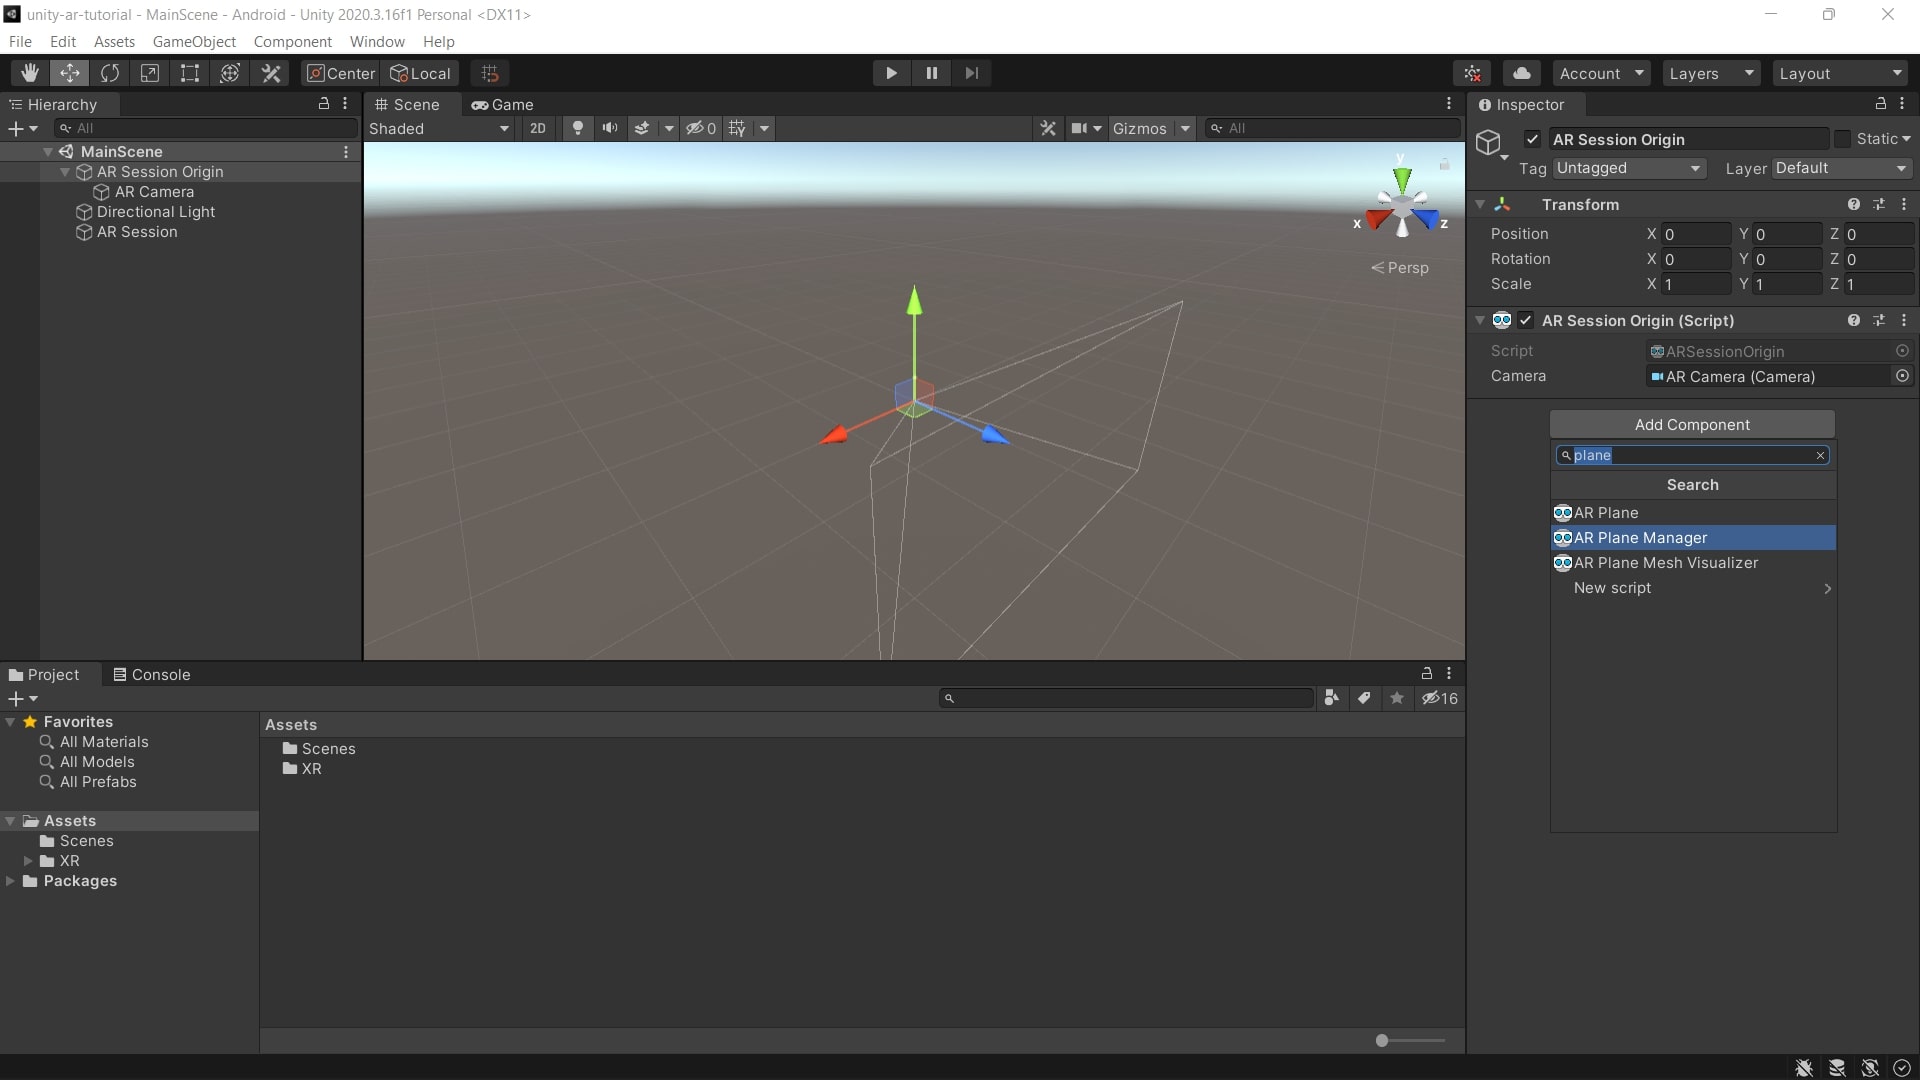
- Double click on the AR Session Origin object in the Hierarchy.
- Add the AR Plane Manager component.
- Select Horizontal in the drop-down menu for Detection Mode.
- You might have to click Nothing first, before setting it to Horizontal.
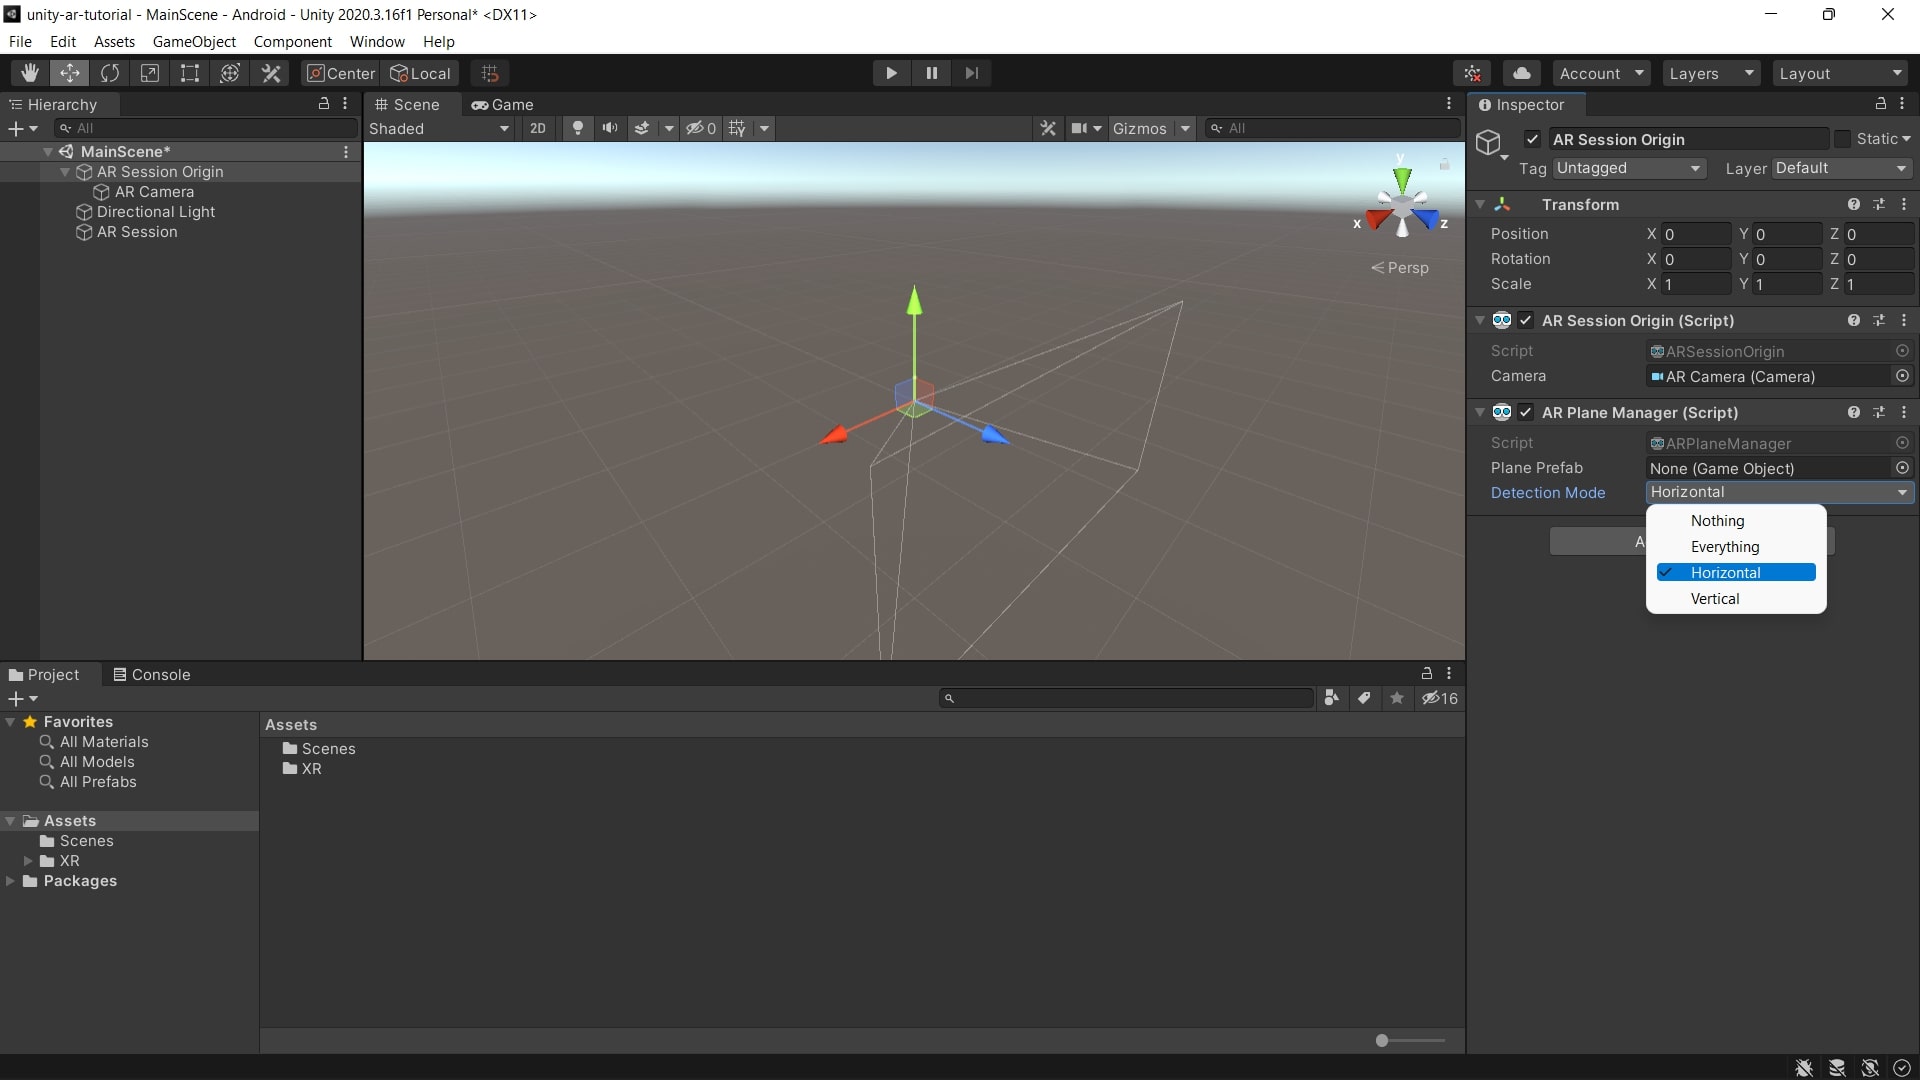
- The manager is now tracking horizontal planes.
2. Visualize Planes
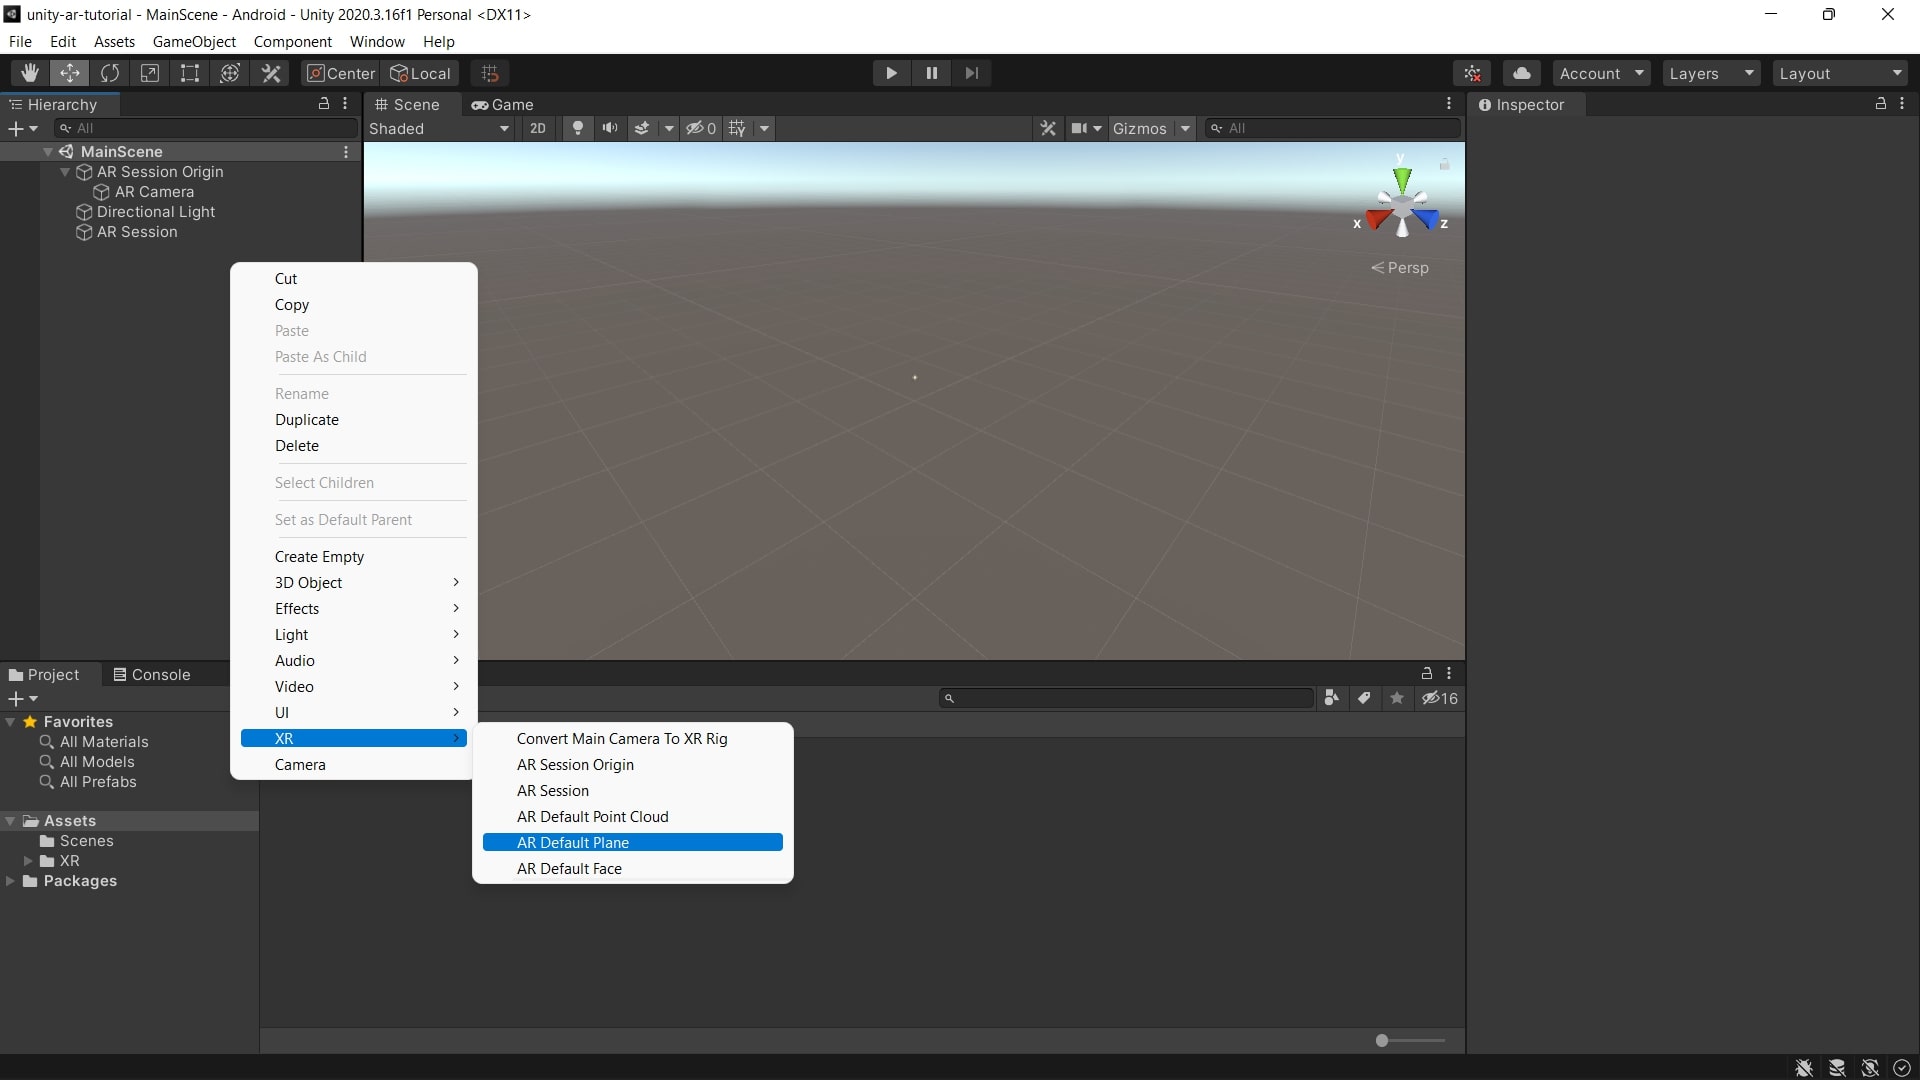
- Create an AR Default Plane object by right-clicking on the Hierarchy > XR > AR Default Plane.
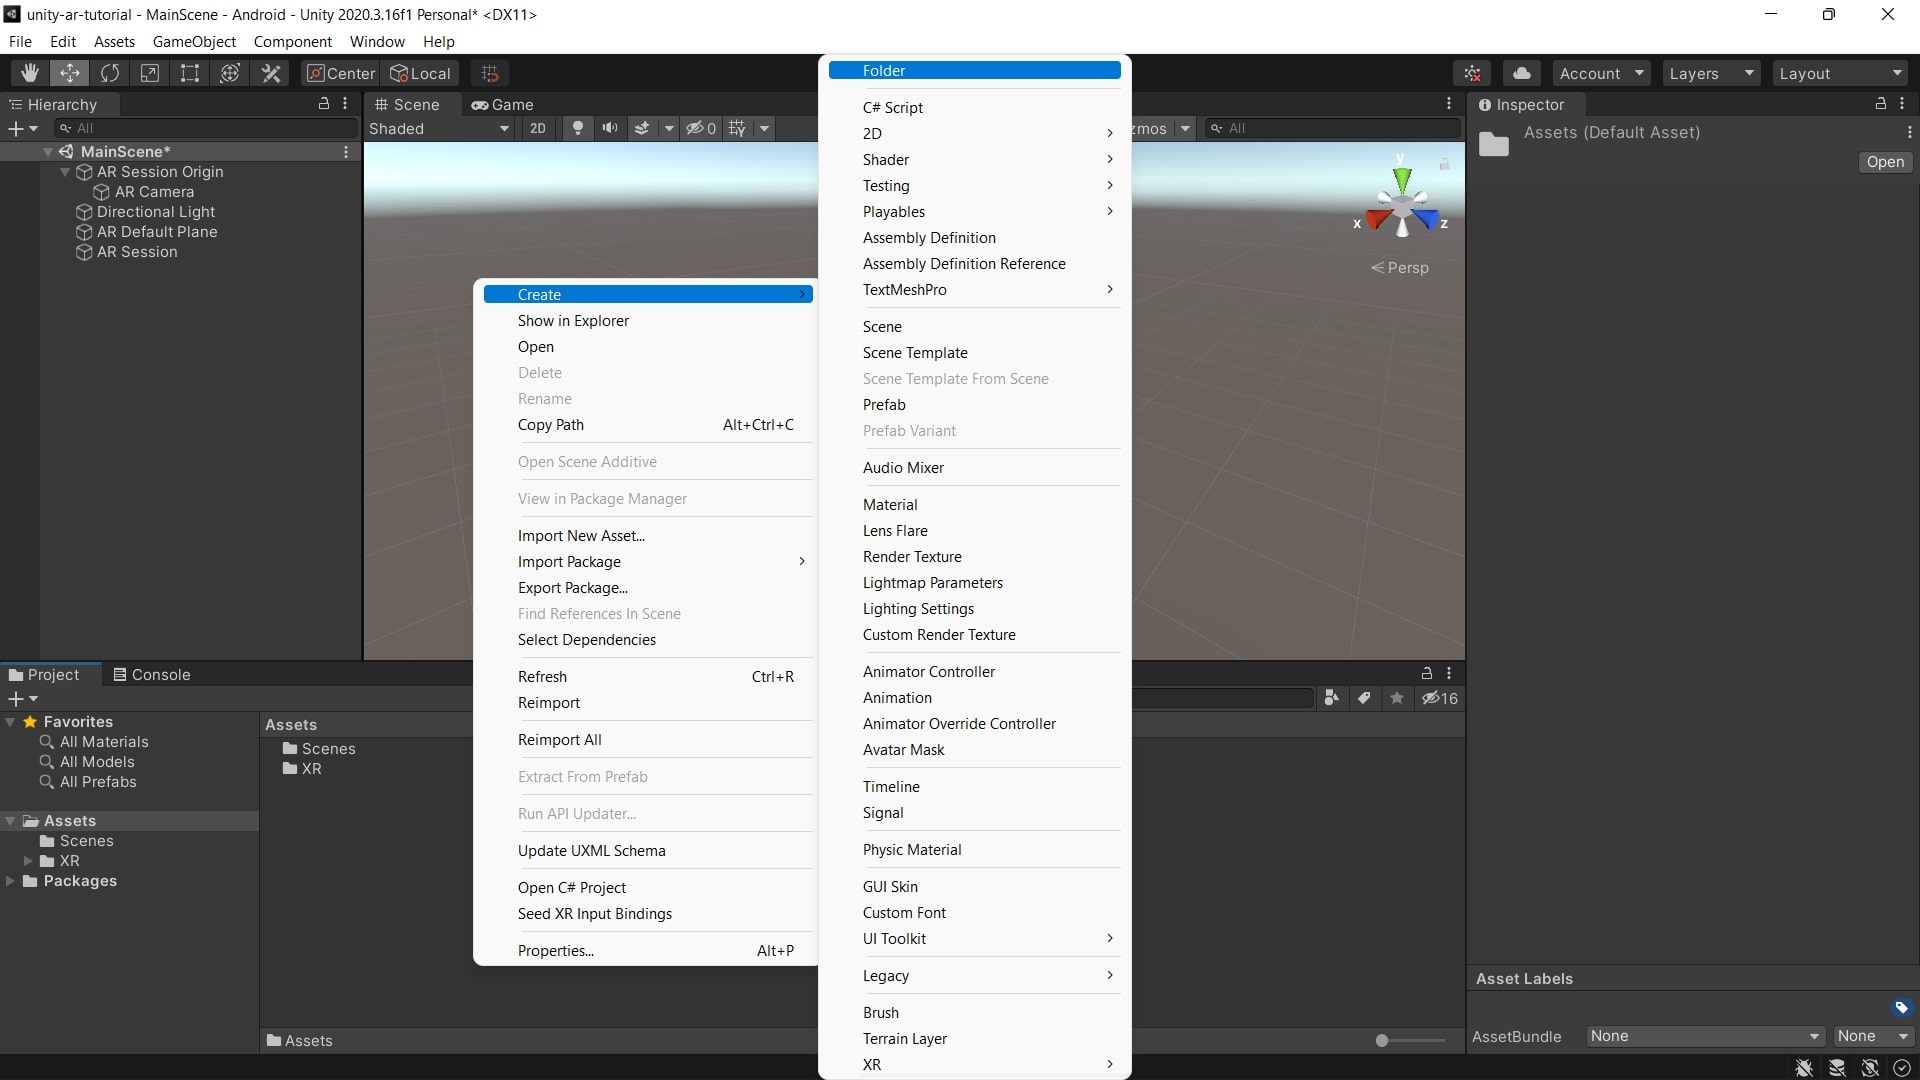
- Create a Folder named Prefabs in the Assets folder by right-clicking on the Assets > Create > Folder.
- Drag and drop the AR Default Plane object into the Prefabs folder to save it as a prefab.
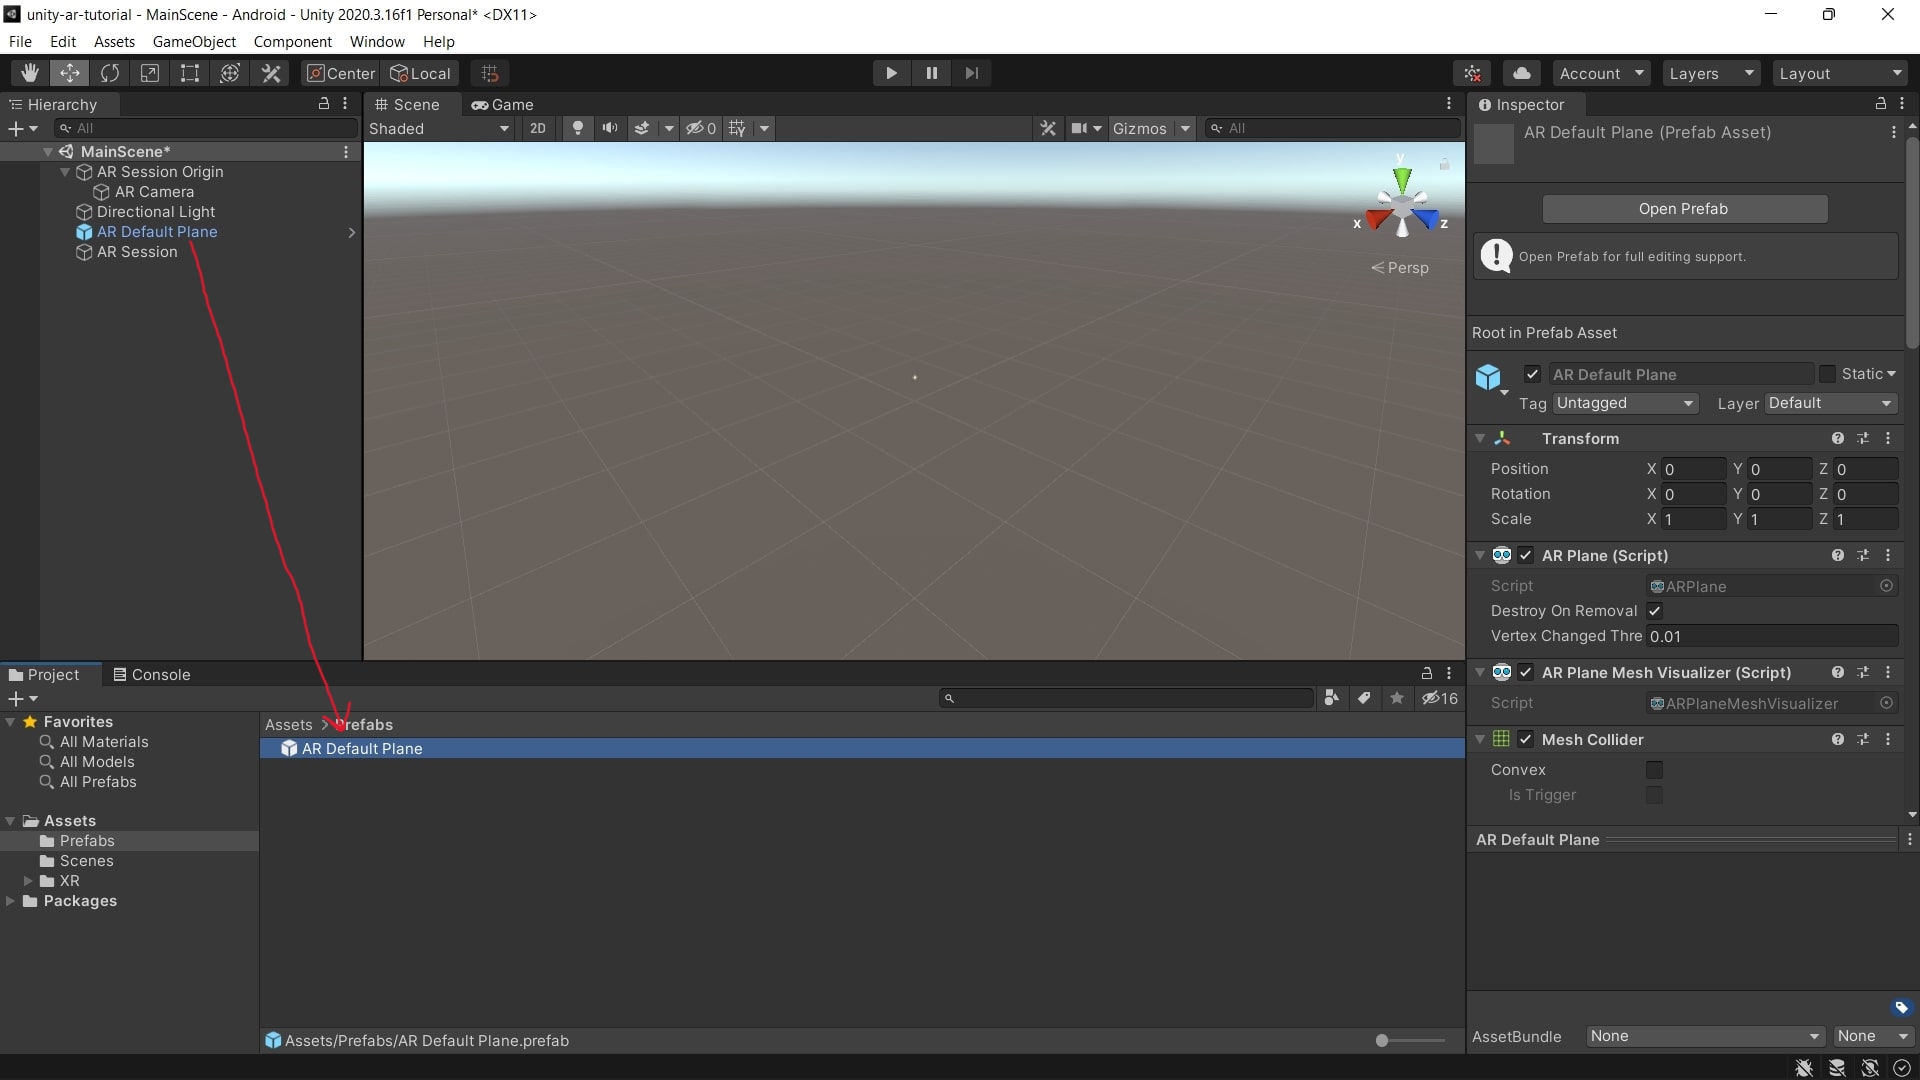
- Delete the AR Default Plane object from the Hierarchy.
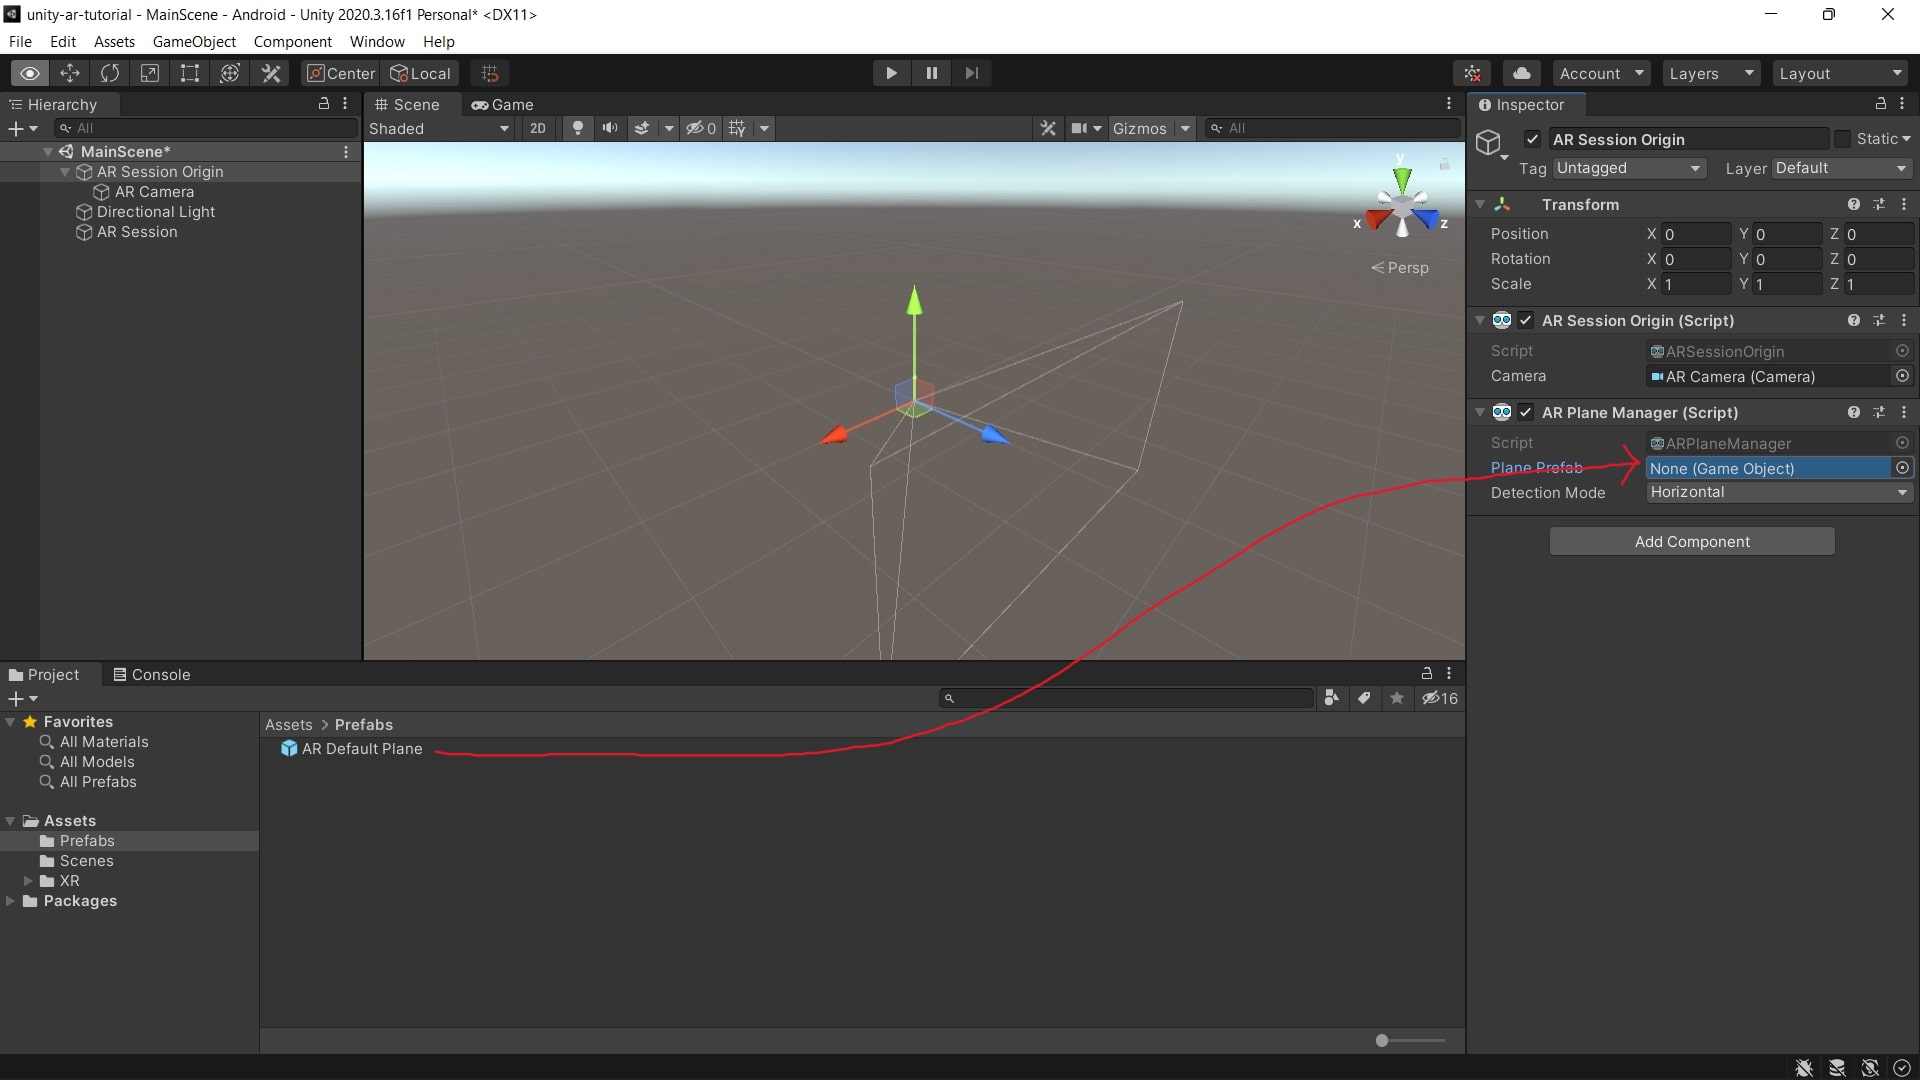
- Double click on the AR Session Origin object in the Hierarchy.
- Drag and drop the AR Default Plane prefab from the folder into the AR Plane Manager Plane Prefab field.
3. Place cube on plane
- Double click on the AR Session Origin object in the Hierarchy.
- Add the AR Raycast Manager component.
- Create a Cube by right-clicking on the Hierarchy > 3D Object > Cube.
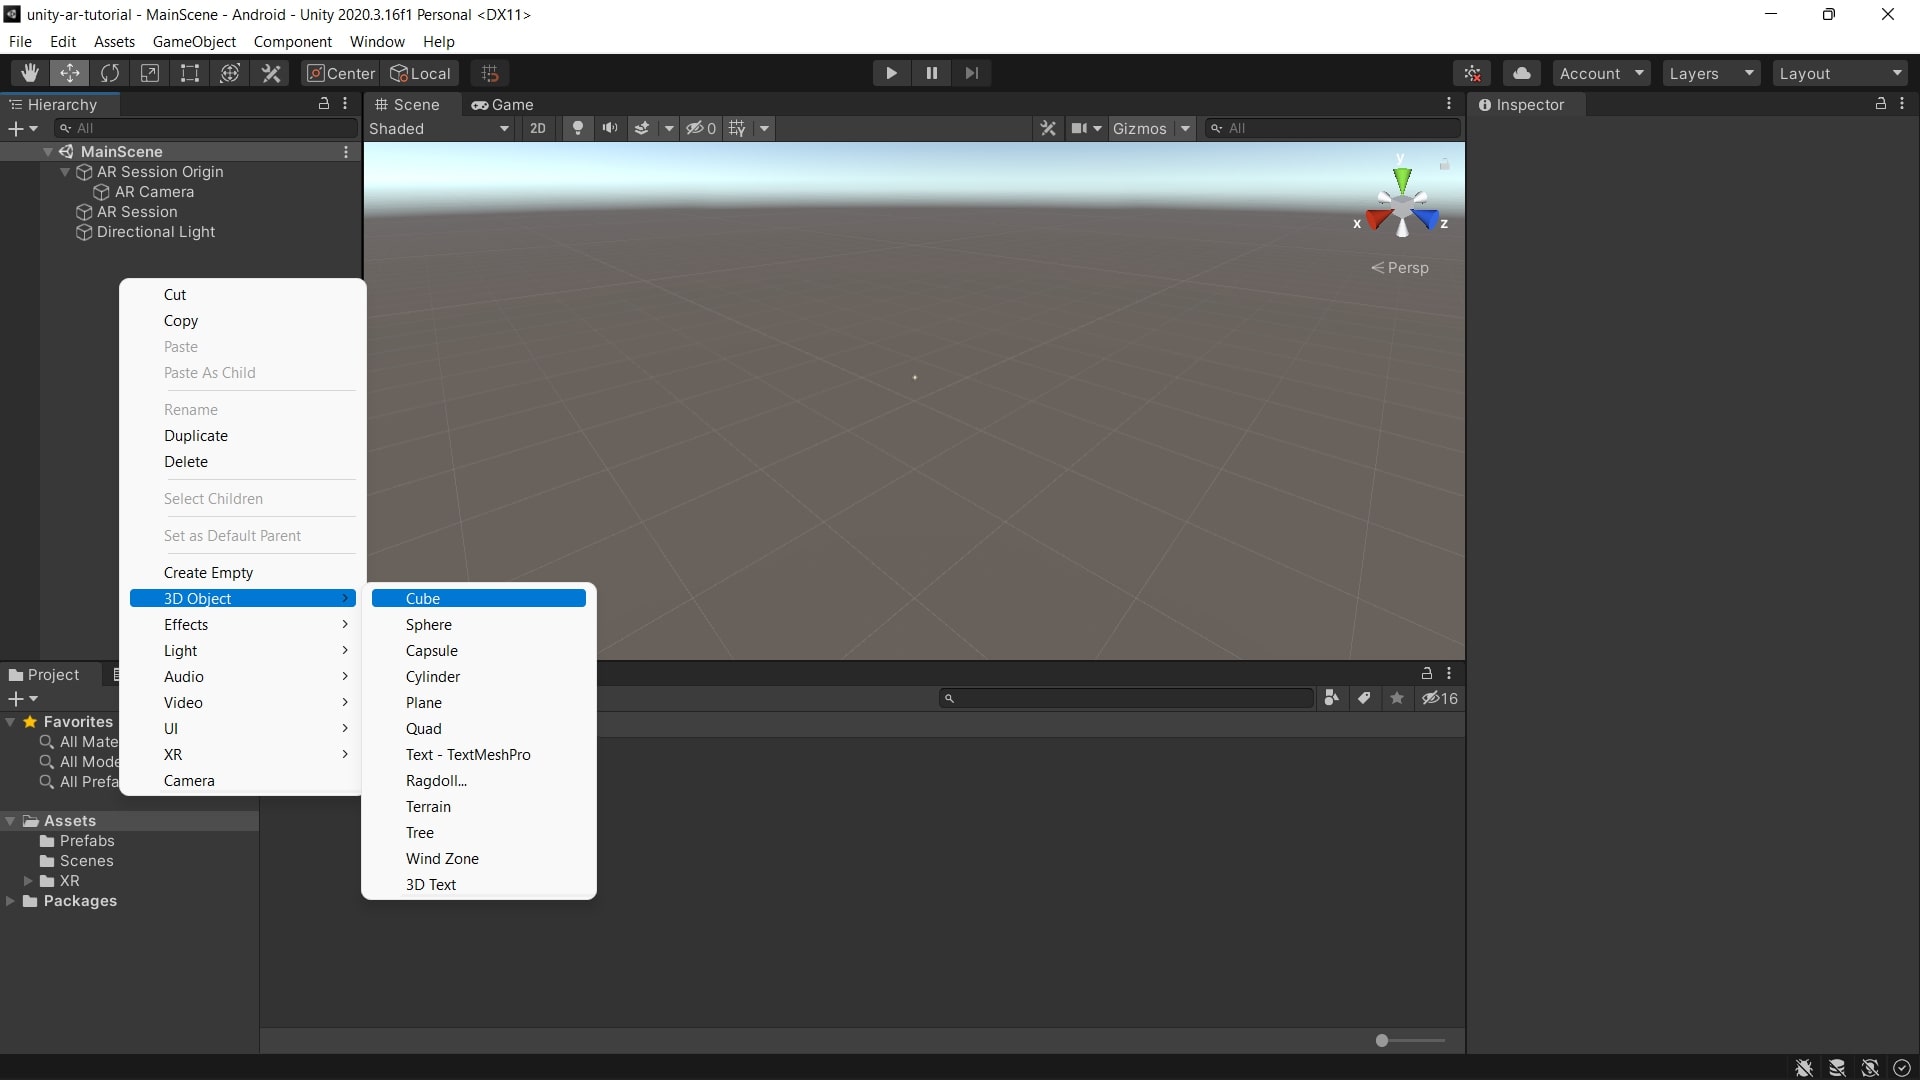
- Create an Empty Object by right-clicking on the Hierarchy > Create Empty and rename it to Spawn Manager.
- Create another Empty Object named Target Object.
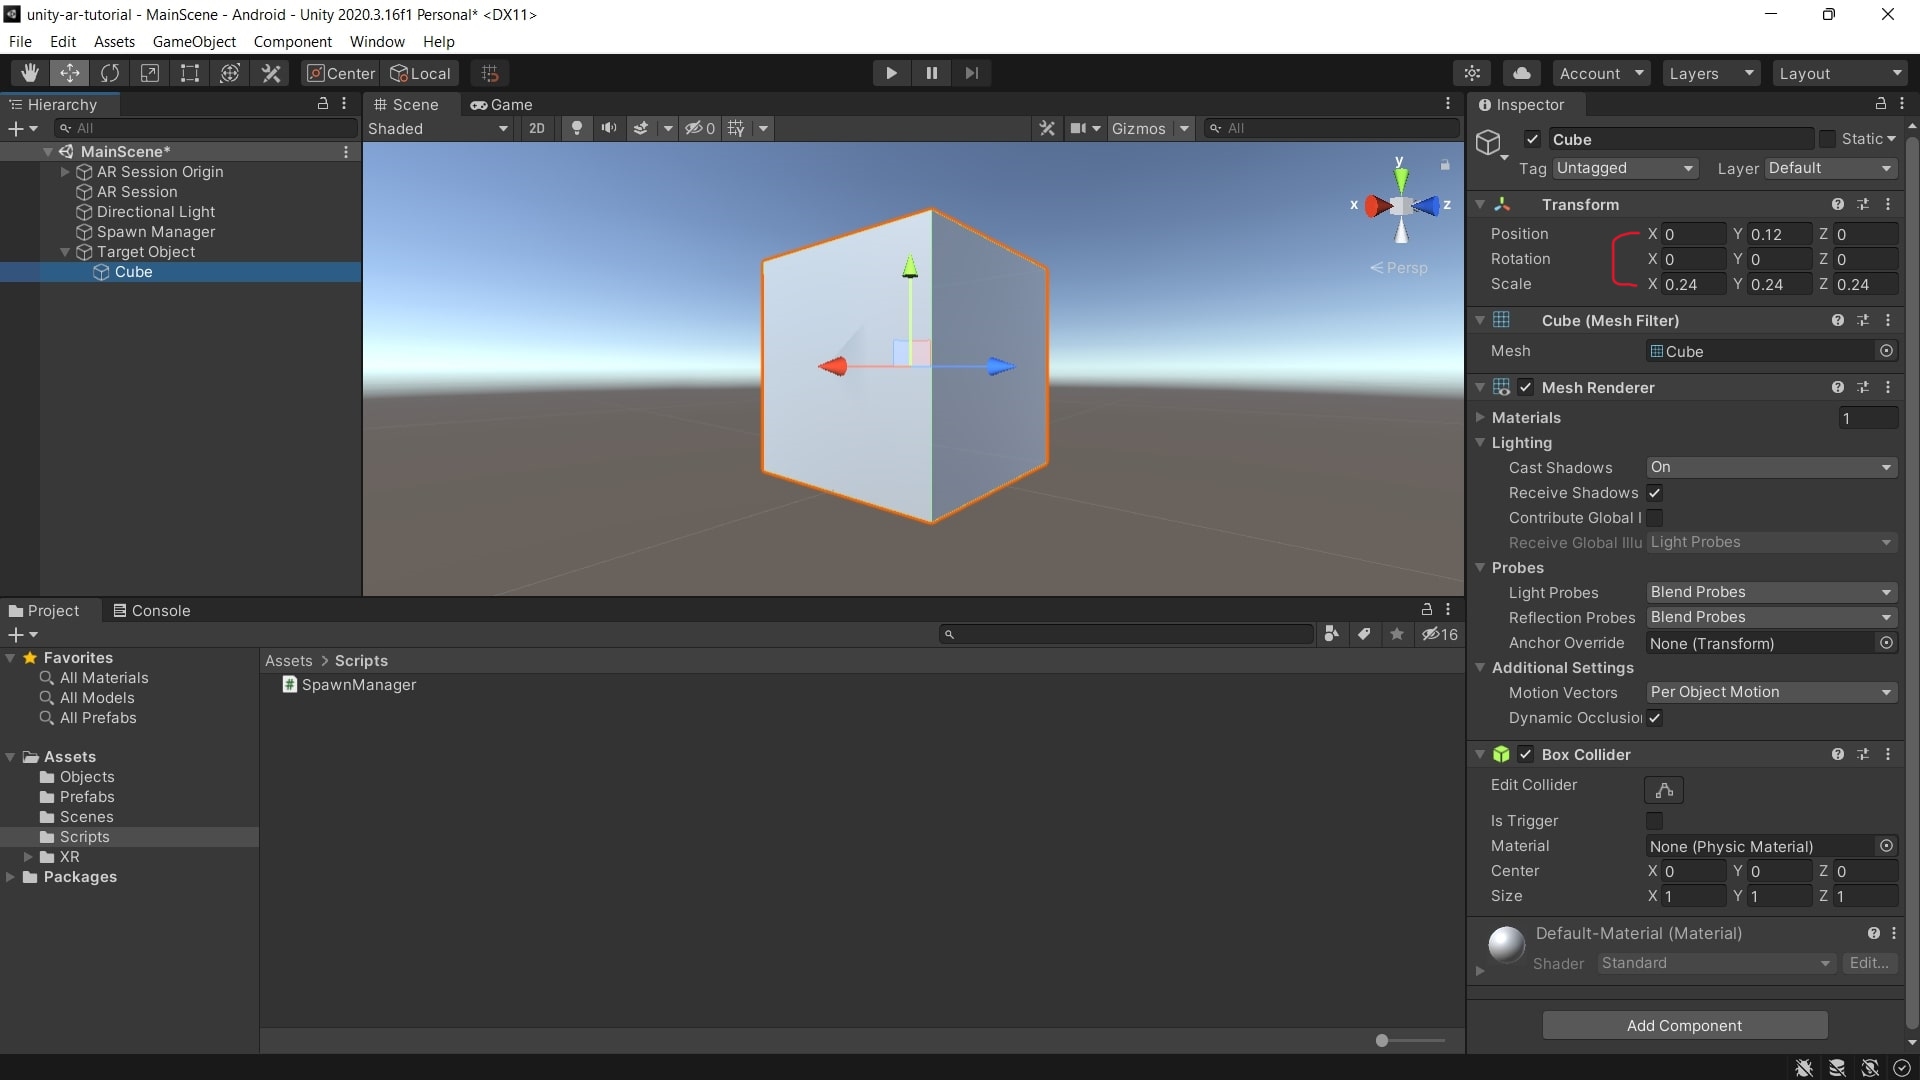
- Drag and drop the Cube on the Target Object in Hierarchy.
- Double click on the Cube object in the Hierarchy.
- Set the scale of the cube to 0.24 in all dimensions in the Inspector.
- Set the position of the cube to be 0.12 in the Y dimension.
- Drag and drop the Target Object into the Prefabs folder to save it as a prefab.
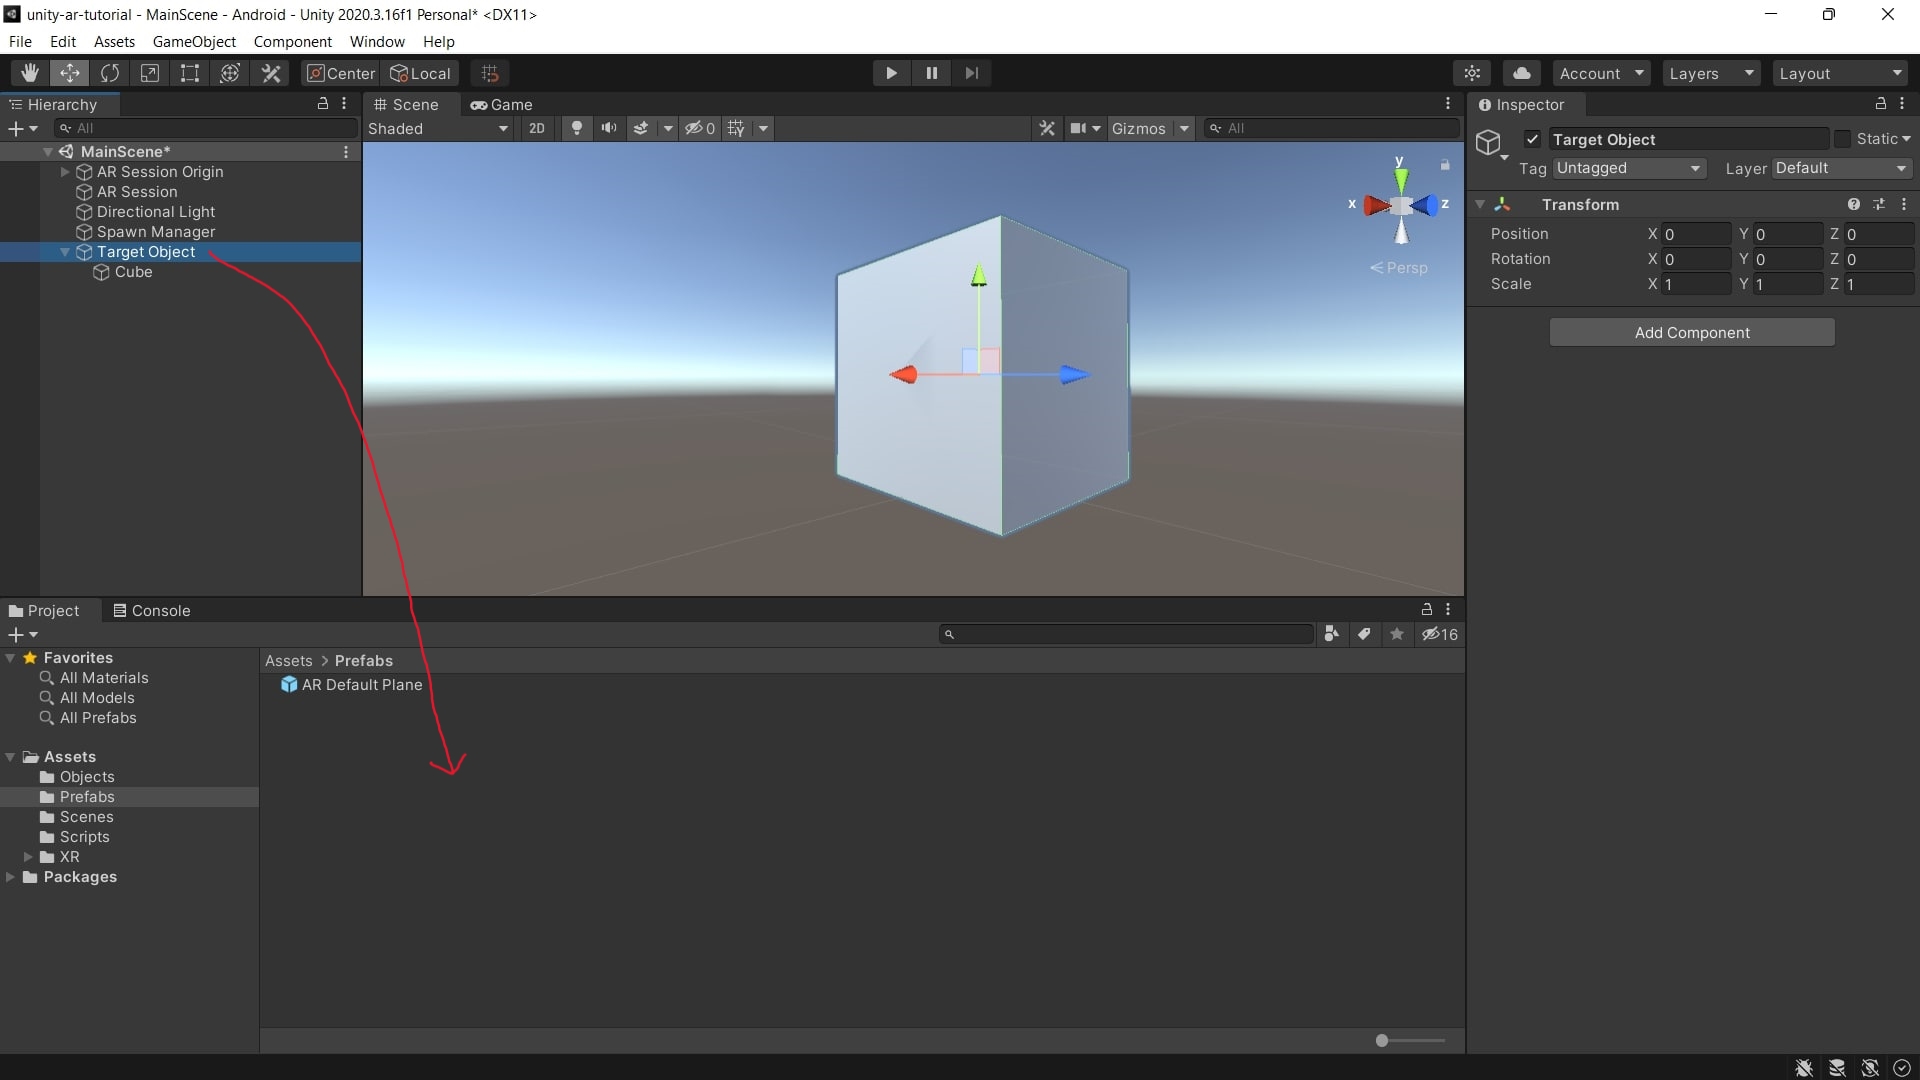
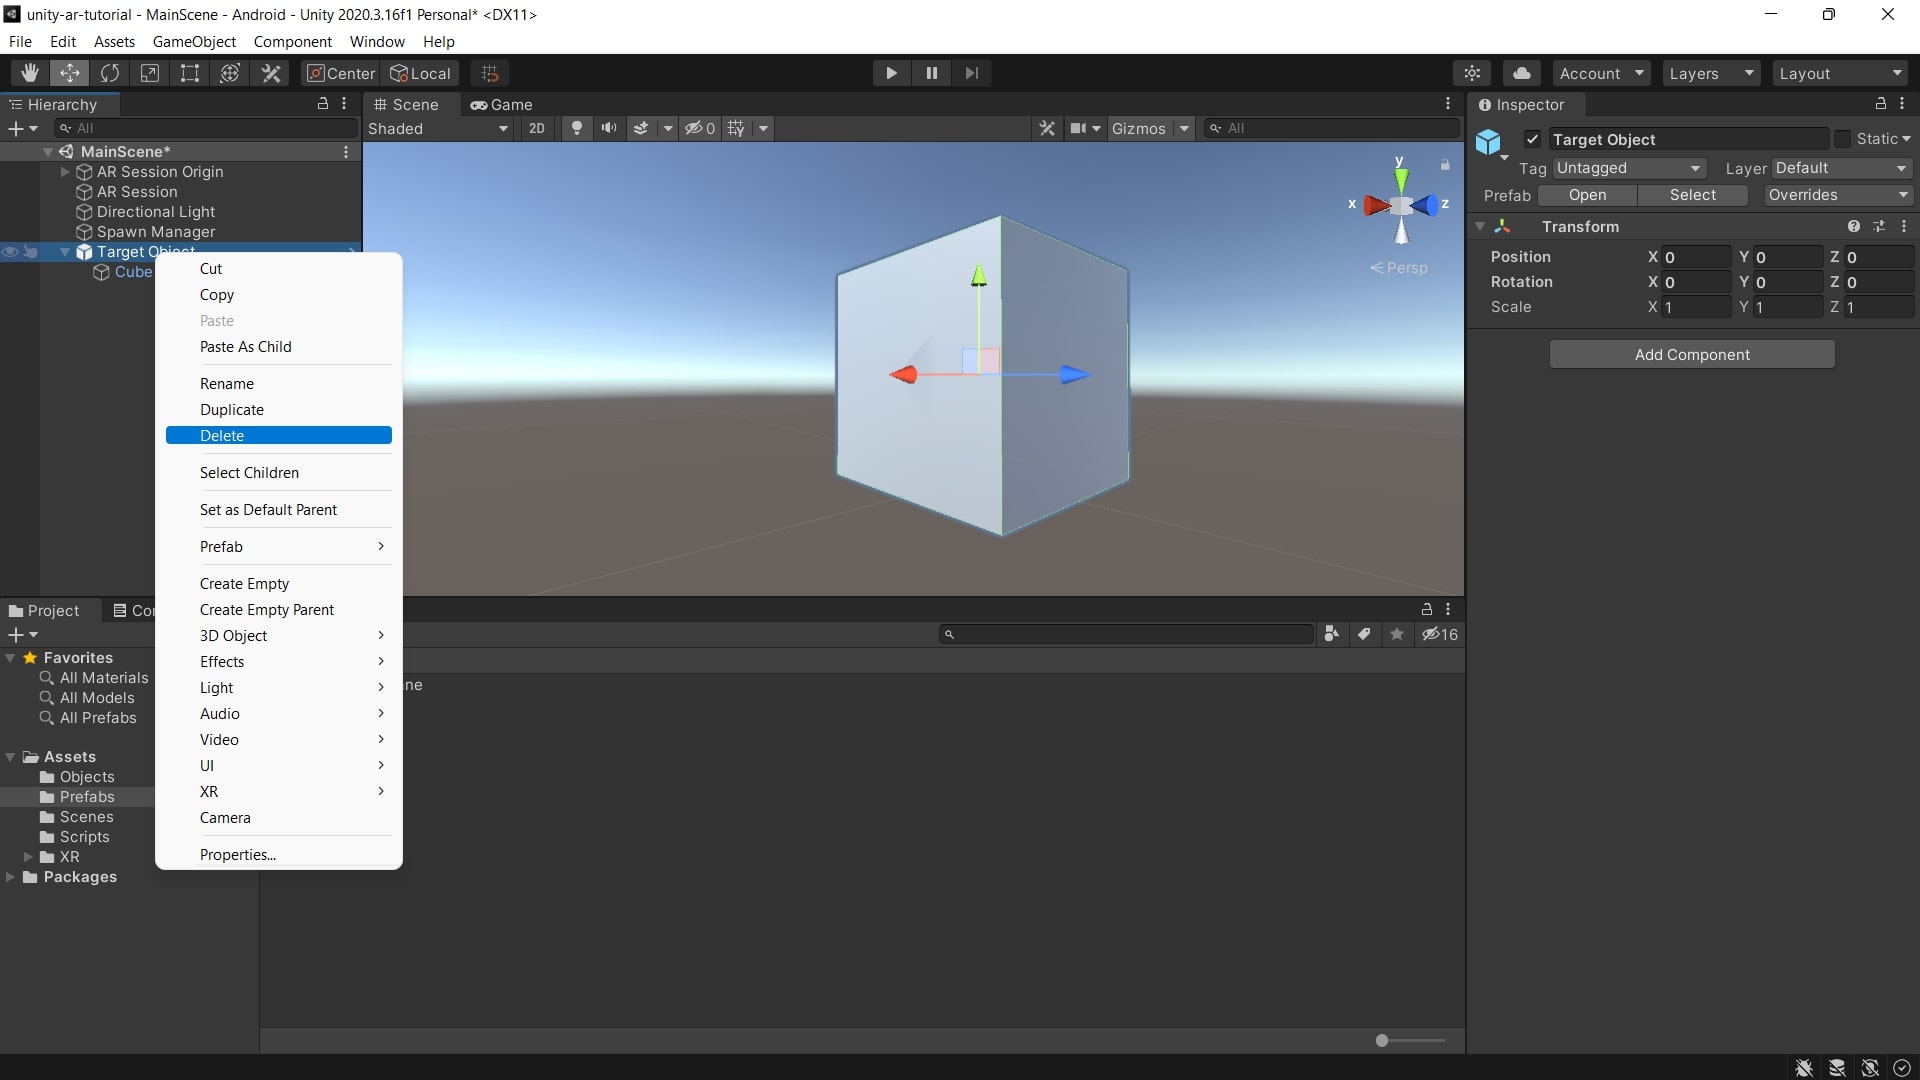
- Delete the Target Object object from the Hierarchy.
- Create a Folder named Scripts in the Assets folder by right-clicking on the Assets > Create > Folder.
-
Create a C# Script named SpawnManager in the Assets folder by right-clicking on the Assets > Create > Folder.
- Open SpawnManager script and replace it’s content with the script below:
using System.Collections;
using System.Collections.Generic;
using UnityEngine;
using UnityEngine.EventSystems;
using UnityEngine.XR.ARFoundation;

public class SpawnManager : MonoBehaviour
{
    [SerializeField] Camera cam;
    [SerializeField] ARRaycastManager raycastManager;
    [SerializeField] GameObject obj;

    List<ARRaycastHit> hits;
    GameObject spawnedObj;

    private void Awake()
    {
        hits = new List<ARRaycastHit>();
        spawnedObj = null;
    }

    private void Start()
    {
        if (!cam)
            cam = FindObjectOfType<Camera>();
        if (!raycastManager)
            raycastManager = FindObjectOfType<ARRaycastManager>();
    }

    private void Update()
    {
        if (Input.touchCount == 0) return;

        RaycastHit hit;

        Touch touch = Input.GetTouch(0);
        Ray ray = cam.ScreenPointToRay(touch.position);


        if (
            !EventSystem.current.IsPointerOverGameObject(touch.fingerId)
            && raycastManager.Raycast(touch.position, hits)
        )
        {
            if (
                touch.phase == TouchPhase.Began
                && !spawnedObj
                && Physics.Raycast(ray, out hit)
            )
            {
                SpawnObject(hits[0].pose.position);
            }
            else if (
                (
                    touch.phase == TouchPhase.Moved
                    || touch.phase == TouchPhase.Began
                )
                && spawnedObj
            )
            {
                spawnedObj.transform.position = hits[0].pose.position;
            }
        }
    }

    private void SpawnObject(Vector3 position)
    {
        if (spawnedObj) Destroy(spawnedObj);
        spawnedObj = Instantiate(obj, position, Quaternion.identity);
    }
}
- Double click on the Spawn Manager object in the Hierarchy.
- Add the SpawnManager script as a component.
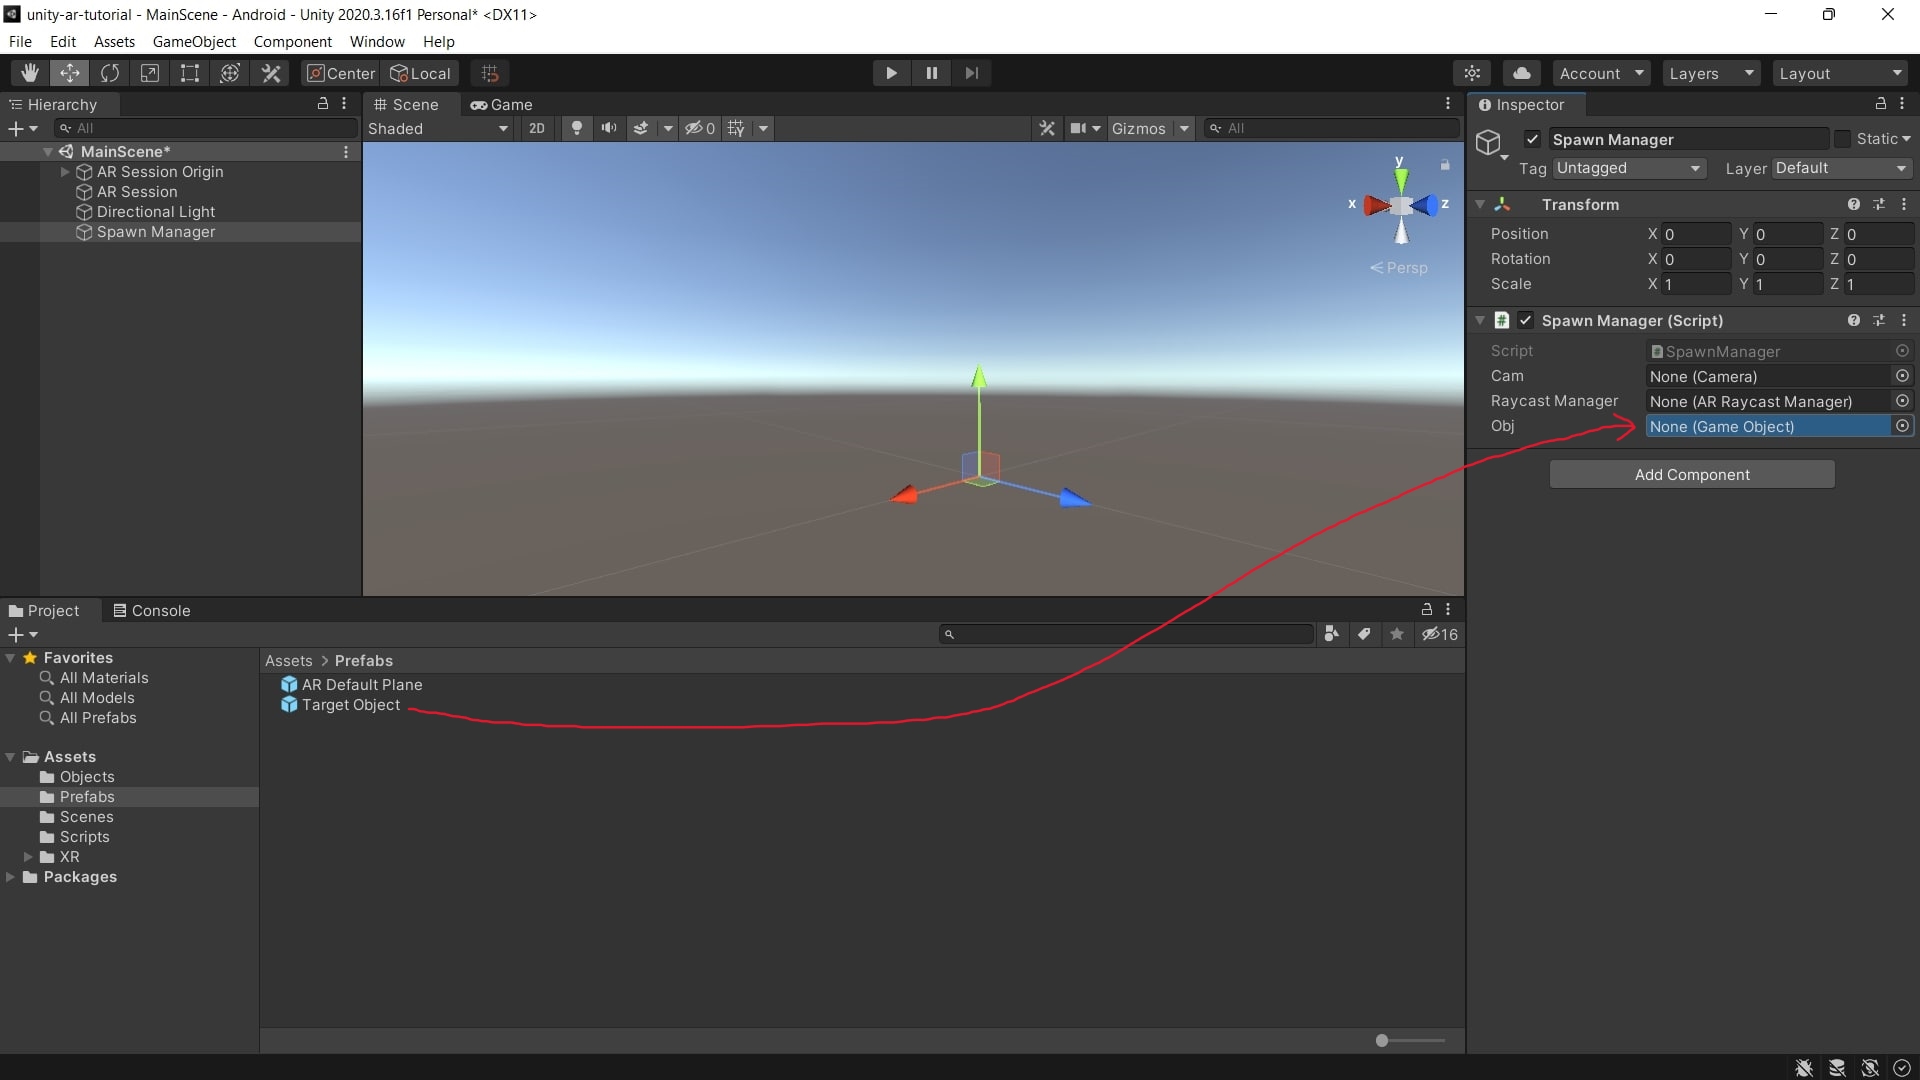
- Drag and drop the Target Object from the Prefabs folder into the Spawn Manager Obj field.
- You can now build and run your project. Make sure to tap your screen to instantiate a cube!